

Deploying a dockerized NodeJS Application to Heroku using Github Actions


In this tutorial, we will be deploying a simple dockerized NodeJS application to Heroku using GitHub Actions.
This topic is centered on continuous integration and continuous deployment of software popularly known as CI/CD.
Continuous Integration is a software development practise where developers integrate code into a shared repository and each integrated code is checked through automated builds and tests. This is done to prevent introducing errors and bugs into the code. Continuous Deployment goes a step further and it is the automated process of deploying the integrated code to production.
Why is CI/CD important? There are a number of reasons why software development teams take CI/CD very importantly. It ensures that new code pushed to the repository is compatible with the existing code. It ensures that the new code does not break the existing code. It automates the process of building and testing the code against different operating systems and software versions to ensure compatibility and accessibility, It allows teams to deploy software faster to production and to users. It helps to eliminate bugs going into production.
Github Actions is a Continuous Integration (CI) tool that enables you to automate your software deployment lifecycle right from your GitHub repository. GitHub Actions uses workflows to build the code and run your tests based on events that can be scheduled (a push event to the repository) or when an external event occurs using the repository dispatch webhook. A workflow is an automated procedure that you add to your repository. Workflows are made up of one or more jobs and can be scheduled or triggered by an event. The workflow can be used to build, test, package, release, or deploy a project on GitHub. Workflow contains jobs which are a set of steps that can be executed on the same runner.
A step is an individual task that can run commands in a job. A step can be either an action or a shell command. Each step in a job executes on the same runner, allowing the actions in that job to share data with each other.
Actions are standalone commands that are combined into steps to create a job. Actions are the smallest portable building block of a workflow GitHub Actions uses YAML syntax to define the events, jobs, and steps. These YAML files are stored in your code repository, in a directory called .github/workflows.
Prerequisites
A GitHub account
An Heroku account
Dockerized NodeJS application hosted in a GitHub repository.
Part 1: Test and confirm that application working locally.
You can create a sample express application from expressjs.com/en/starter/generator.html or running the command below
 express sampleApp
 cd sampleApp
 npm install
 npm start
Alternatively, you can clone this repository.
The Dockerfile is below
FROM node:10-alpine

RUN mkdir /app
WORKDIR /app

COPY package.json /app/
RUN npm install --only=production

COPY . .

EXPOSE 3000

CMD [ "npm", "start" ]
To test the application, you can use the commands
      docker build -t devyapp .
      docker run devyapp -p 3000:3000
Part 2: Create an application on Heroku
Heroku defines itself as a platform as a service based on a managed container system, with integrated data services and a powerful ecosystem, for deploying and running modern apps. Essentially, it is a service where you can deploy your application. Go to heroku.com to create an account. Once logged in, create an app named devyapp because we want it to correspond with our application but you can name it anything you want.

Part 3: Generate an Heroku API key.
Because we want to automate the deployment of our application to Heroku, we need an API key to login to the Heroku container registry. Install the Heroku CLI here and create an authorization token (OAuth token) by using the command heroku authorizations:create
Alternatively, you can create the API key on the Heroku dashboard.
This will create a long-lived user authorization, whose token can be used to authenticate the Heroku CLI in our workflow.
This token will be stored as a GitHub secret and referenced in our workflow as an environment variable. The GitHub secret can be found in the repository settings. We are using secrets because we do not want to expose our token and PII in our repository.
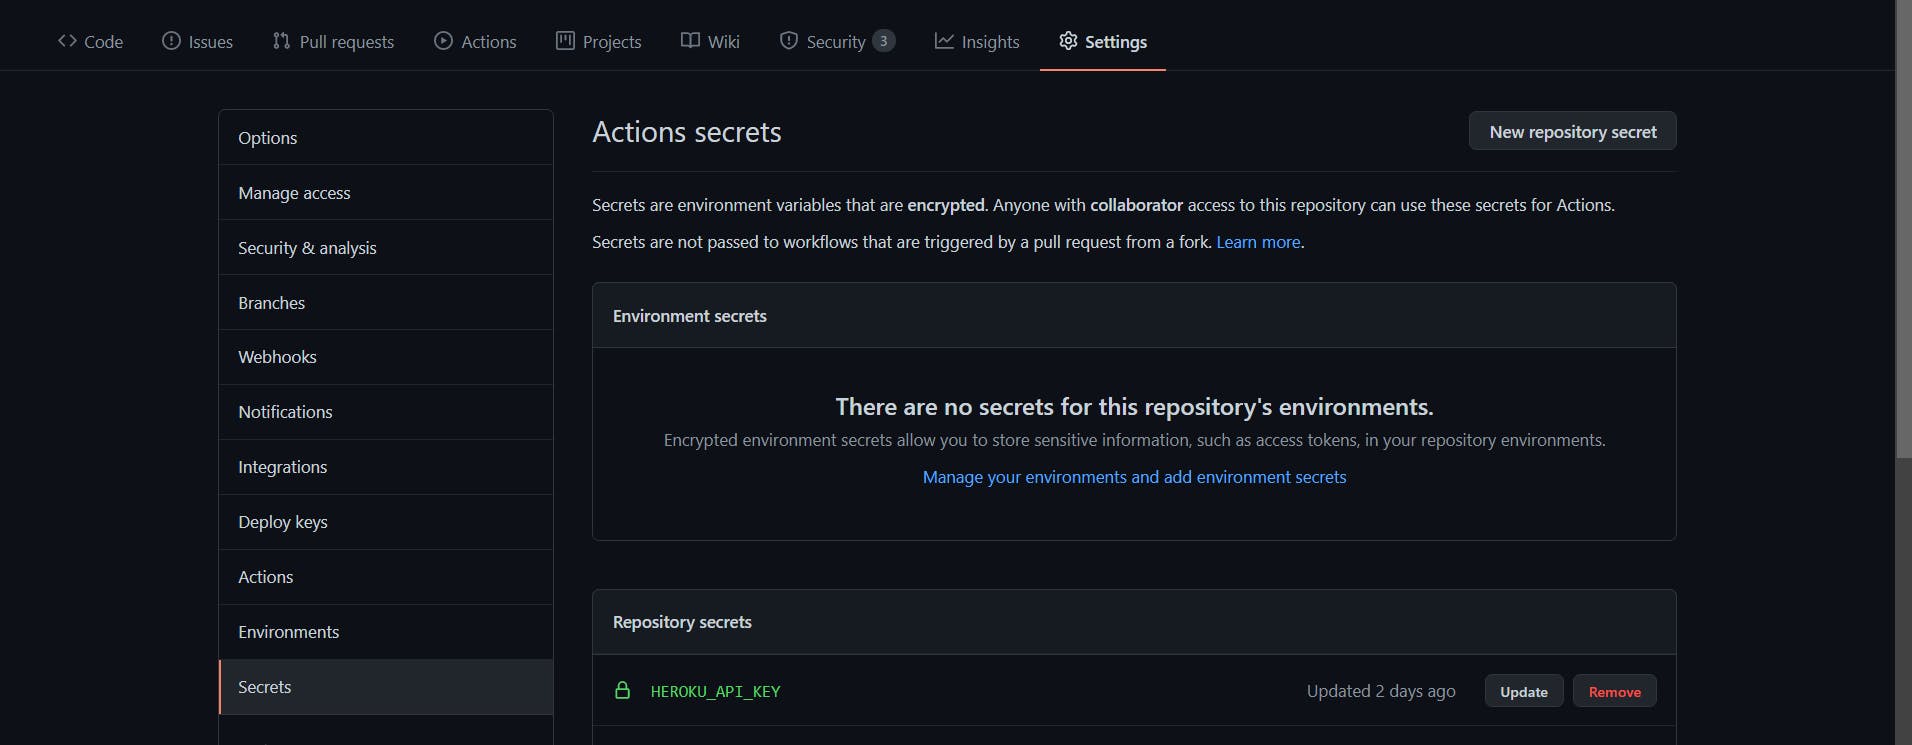
Part 4: Create the GitHub Actions workflow file.
Each GitHub repository has an Actions Tab which we can use to set up our continuous integration workflow. Click on the Actions tab of your Github repository and select the Node.js workflow. This will create the workflow file which is hosted in the .github/workflows directory of your repository. Copy and paste the code below in the yaml file.
name: Node.js CI

on:
  push:
    branches: [ master ]

jobs:
  build:

    runs-on: ubuntu-latest

    strategy:
      matrix:
        node-version: [10.x, 12.x, 14.x, 15.x]
        # iSee supported Node.js release schedule at https://nodejs.org/en/about/releases/

    steps:
    - uses: actions/checkout@v2
    - name: Use Node.js ${{ matrix.node-version }}
      uses: actions/setup-node@v1
      with:
        node-version: ${{ matrix.node-version }}
    - run: npm ci
    - run: npm run build --if-present
    - run: npm test --if-present
    - name: Login to Heroku Container registry
      env:
        HEROKU_API_KEY: ${{ secrets.HEROKU_API_KEY }}
      run: heroku container:login
    - name: Build and push
      env:
        HEROKU_API_KEY: ${{ secrets.HEROKU_API_KEY }}
      run: heroku container:push -a devyapp web
    - name: Release
      env:
        HEROKU_API_KEY: ${{ secrets.HEROKU_API_KEY }}
      run: heroku container:release -a devyapp web
The workflow defines 1 job build with 5 steps.
The first step checkout fetches the contents of the repository to $GITHUB_WORKSPACE, an environment variable that maps to /home/runner/work on the runner.
The second step includes a matrix strategy that builds and tests and builds our application on the different NodeJS versions. If you don't specify a Node.js version, GitHub uses the environment's default Node.js version. This step also installs the dependencies needed to run the application. Using npm ci installs the versions in the package-lock.json or npm-shrinkwrap.json file and prevents updates to the lock file.
The third step logs into the Heroku container registry using the HEROKU_API_KEY set in the Github secrets and referenced in our workflow as an environment variable.
The fourth and fifth steps builds and releases our application to our Heroku app devyapp which was created earlier.
Workflow syntax gives us the ability to filter on branches, and files, as well as GitHub webhook events. For our application, we have defined our workflow to be triggered if there is a push event on the master branch. The workflow will be triggered once a code change has been committed and pushed to the master branch. It can take a few minutes for the deployment to be completed.
To trigger our workflow, we can make a change to any of the files in our repository and push to GitHub. Also, we can manually trigger our workflow by clicking on the Start Commit button.

This can take a few minutes to complete and a green or red checkmark tells us whether the build was successful or not.
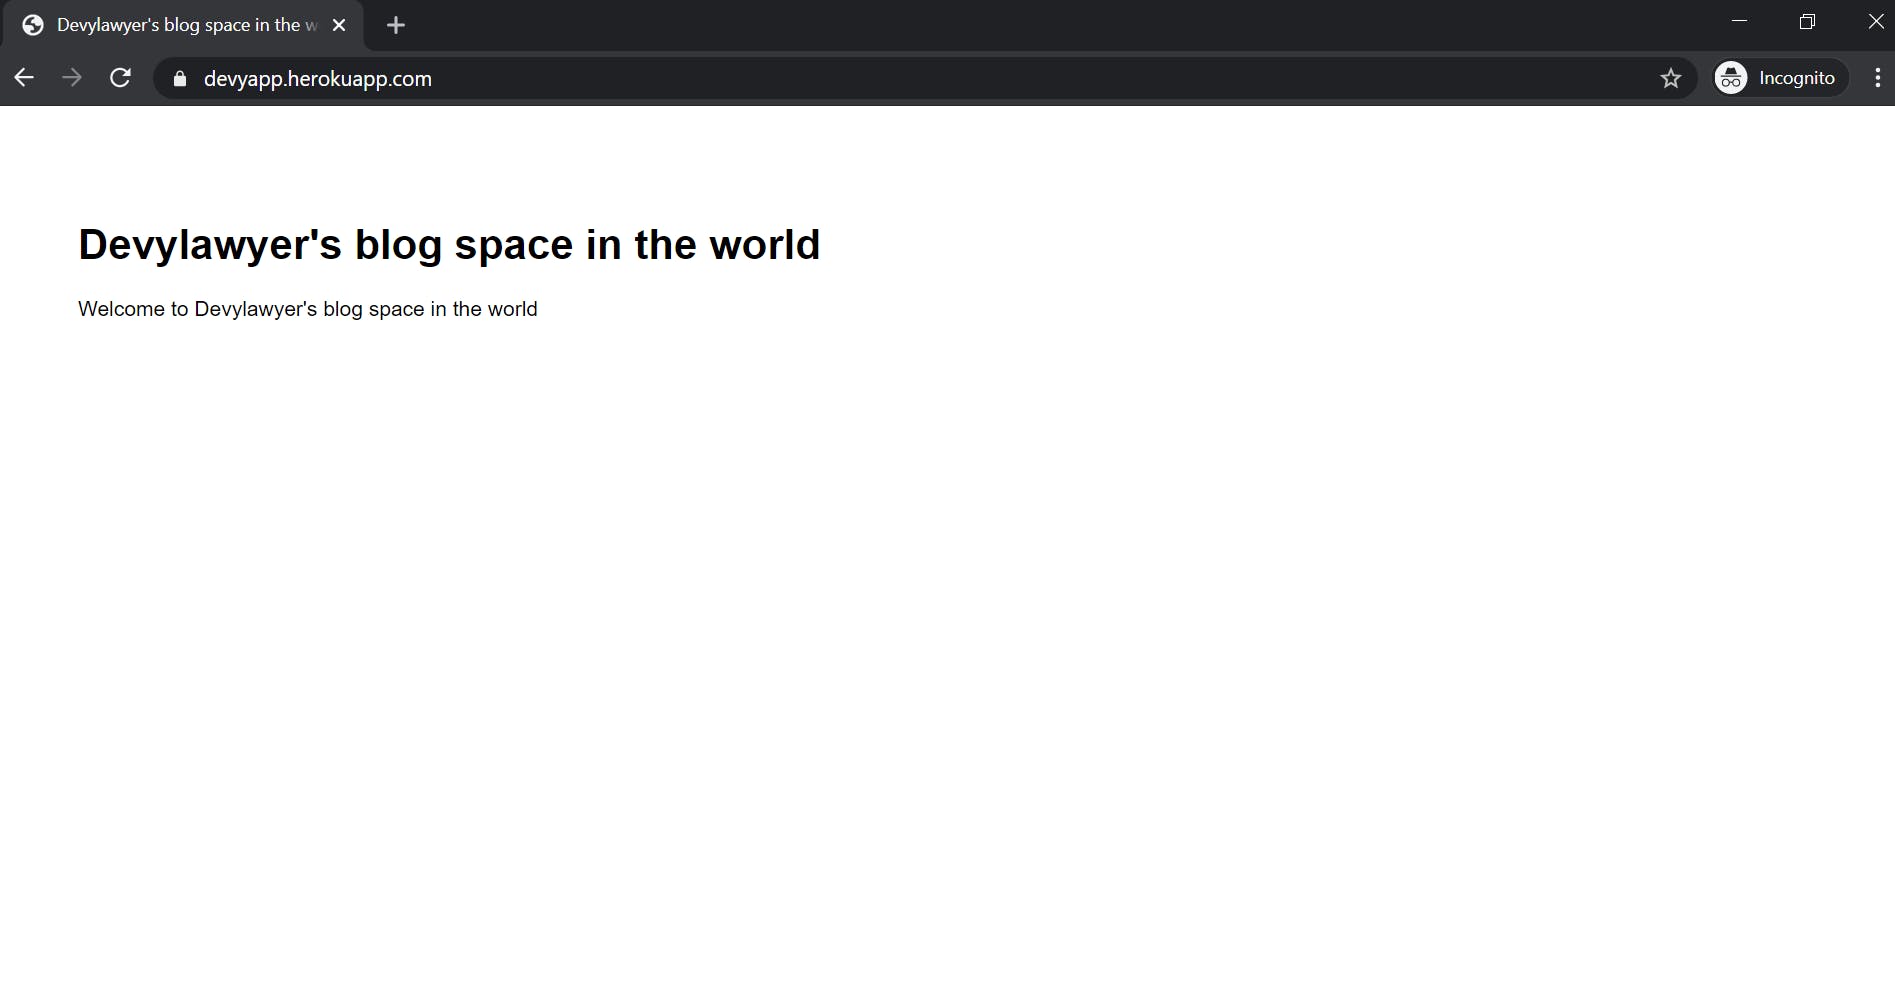
We can verify that our Heroku application is running by navigating to the URL of the app we created - devyapp.herokuapp.com
That is it, folks.
Please feel free to drop your comments below and if you have any questions, you can reach me on Twitter @devylawyer.