

Deploy a simple NodeJS app to AWS Elastic Beanstalk using PowerShell


Deploy a simple NodeJS app to AWS Elastic Beanstalk using PowerShell
In this tutorial, we will try to deploy a simple NodeJs app to AWS and get it running in the cloud.
What is AWS? According to their website, Amazon Web Services (AWS) is the world’s most comprehensive and broadly adopted cloud platform, offering over 175 fully featured services from data centers globally. It is the world’s leading platform when it comes to cloud computing.
The prerequisites needed to successfully deploy this app are:
- A decent knowledge of Git. Git is a free and open source distributed version control system designed to handle everything from small to very large projects with speed and efficiency. You can learn about it here — https://git-scm.com/
- AWS Account. As a new user, you can get 12 months of free services offered within AWS.
- A Command line tool. For Windows users, you can use PowerShell or Git Bash. For Mac users, the terminal works just fine.
- Code Editor.
There are different ways to deploy a NodeJs application to AWS but in this tutorial, we will use AWS Elastic Beanstalk CLI.
Part 1: Create a NodeJS Express application up and running locally.
a) First step is to install NodeJS on your computer. NodeJs comes with the node package manager NPM and can be downloaded here.
b) Initialize an empty Git repository using the command git init.
c) Create a file named .gitignore and add the node_modules directory to it. These files will be excluded from being added to the repository when pushed to GitHub or cloud.
Create a sample express application from https://expressjs.com/en/starter/generator.html or running the commands below
express sampleApp
cd sampleApp
npm install
npm start
I have create a sample express application called Devylawyer’s blog and it is running locally.
NodeJS application running locally
Part 2: Install the AWS Elastic Beanstalk CLI
I am using a Windows computer so I will be using PowerShell to install the EB CLI. There are different ways to install the EB CLI but in this tutorial, I will use the setup scripts as recommended way in the AWS documentation. Details can be found here.
a) Clone this repository
Use the following:
git clone [https://github.com/aws/aws-elastic-beanstalk-cli-setup.git](https://github.com/aws/aws-elastic-beanstalk-cli-setup.git)</span>
b) In PowerShell or in a Command Prompt window:
Set-ExecutionPolicy RemoteSigned
.\aws-elastic-beanstalk-cli-setup\scripts\bundled_installer</span>
If you encounter an error with the message “No module named ‘virtualenv’”, use the following commands to install virtualenv and the EB CLI:
pip uninstall -y virtualenv
pip install virtualenv
python .\aws-elastic-beanstalk-cli-setup\scripts\ebcli_installer.py</span>
If you already have Python installed on your system, run the following only :
python .\aws-elastic-beanstalk-cli-setup\scripts\ebcli_installer.py</span>
Part 3: Create an IAM User
Create a user and assign the Elastic Beanstalk Full Access permission. I have already created a group named eb-fullaccess and assigned the Elastic Beanstalk Full Access permission to the group. Any user added to the group will inherit the permissions of the group. Follow the prompts until you get to the Create User page.


Add a user


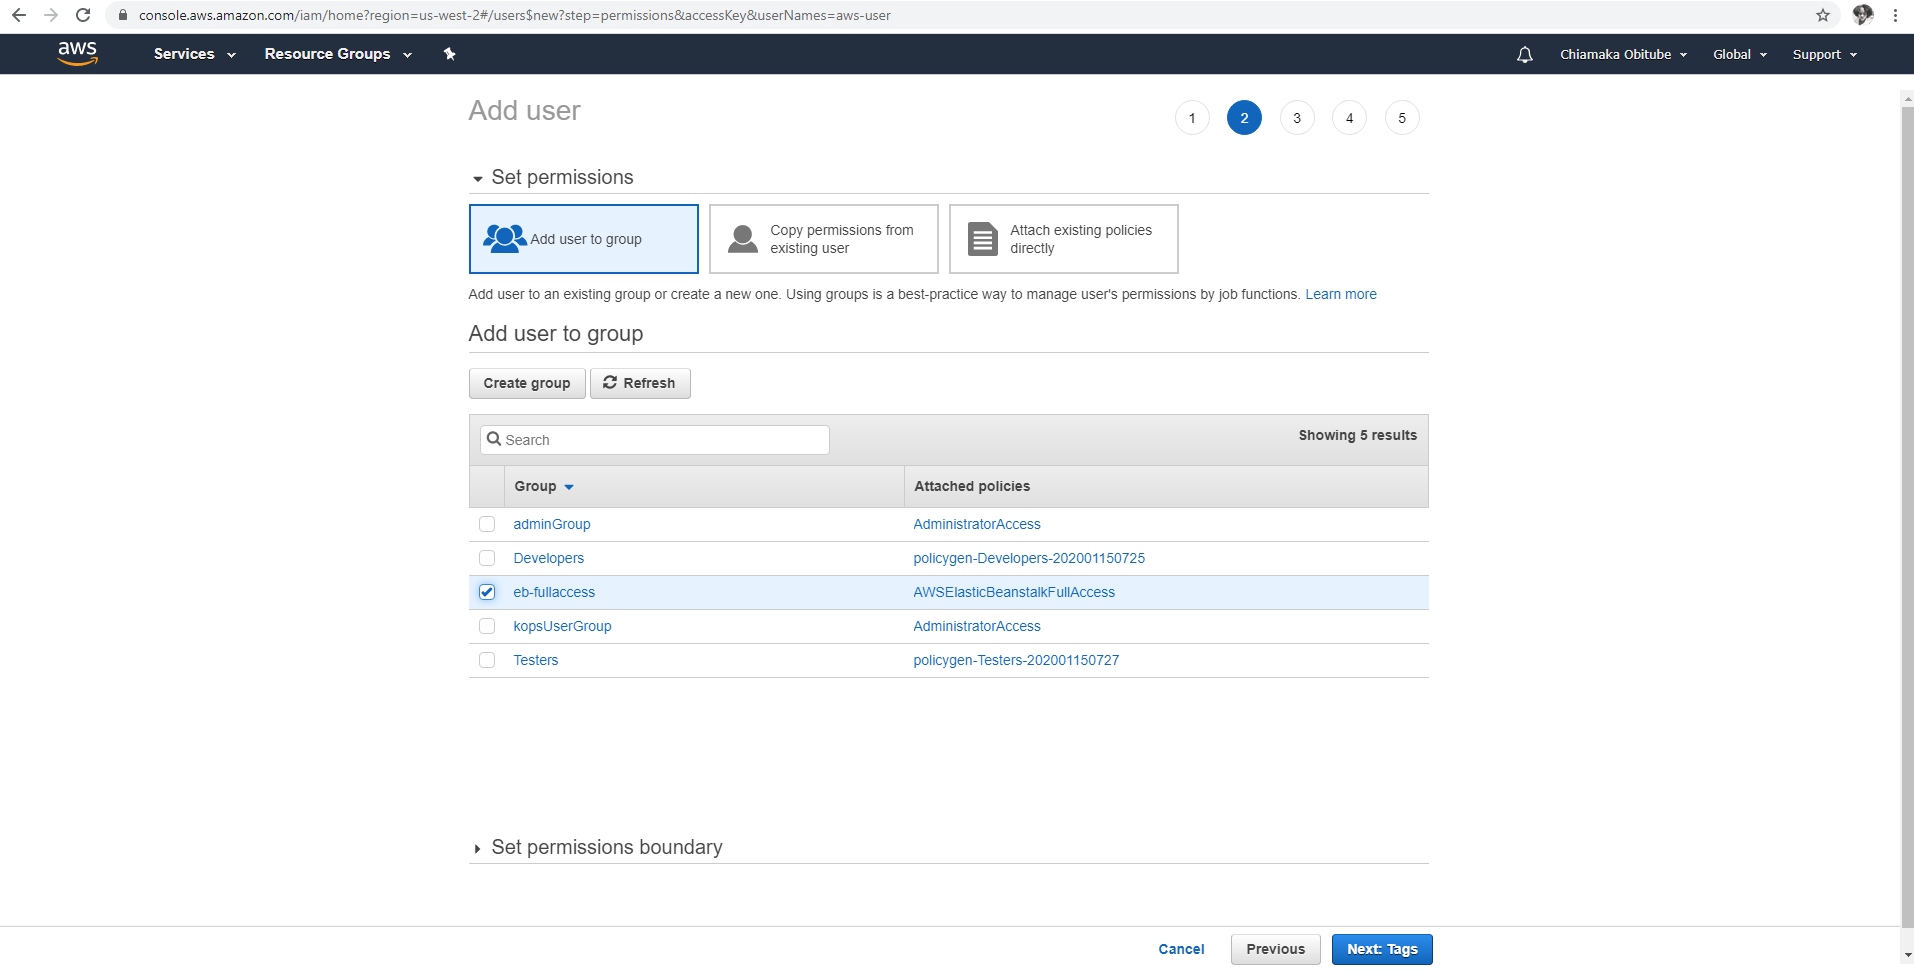
Add user to eb-fullaccess group
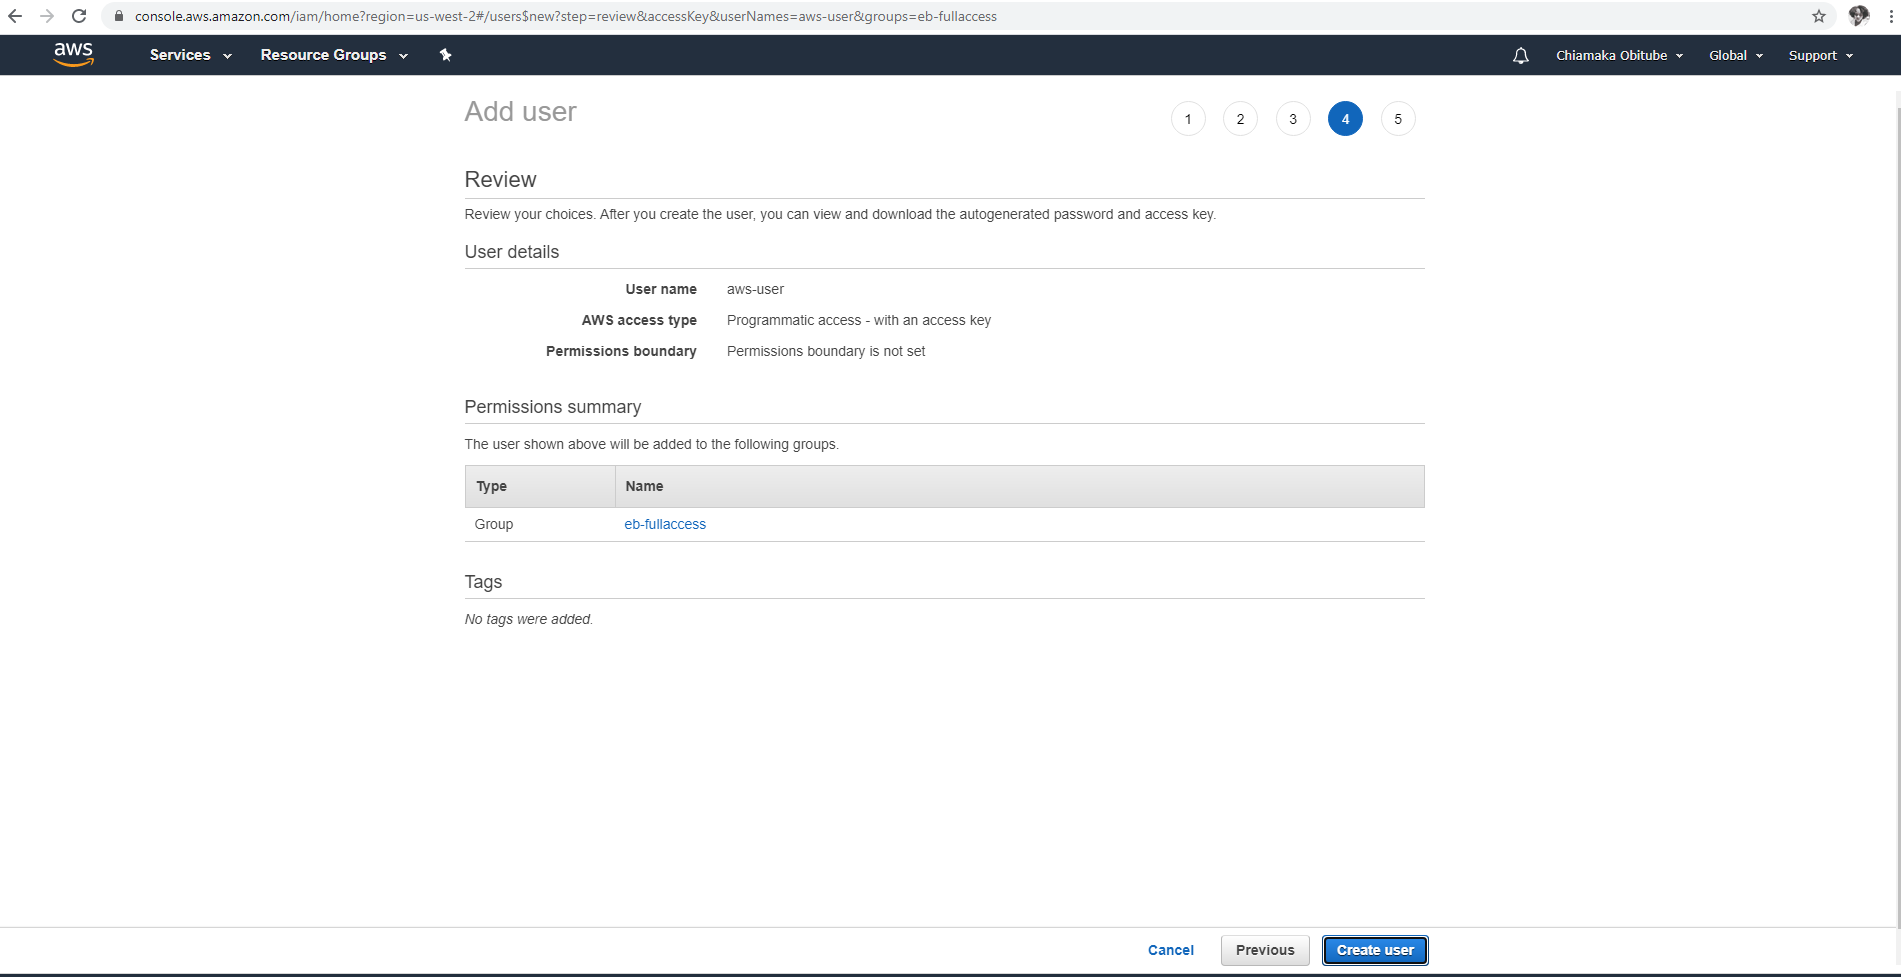
Review page

Ensure to download the CSV file as it contains the Access Key ID and the secret access key.
We will now configure a profile for the newly created user aws-user. Ensure you are in the directory.

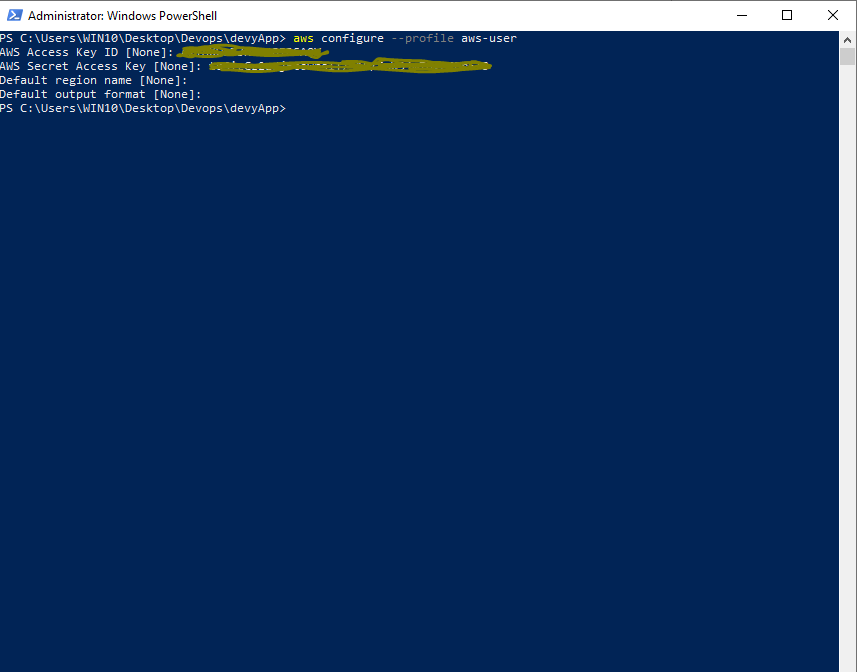
Configure aws user
Part 3: Use the Elastic Beanstalk CLI to deploy the application.
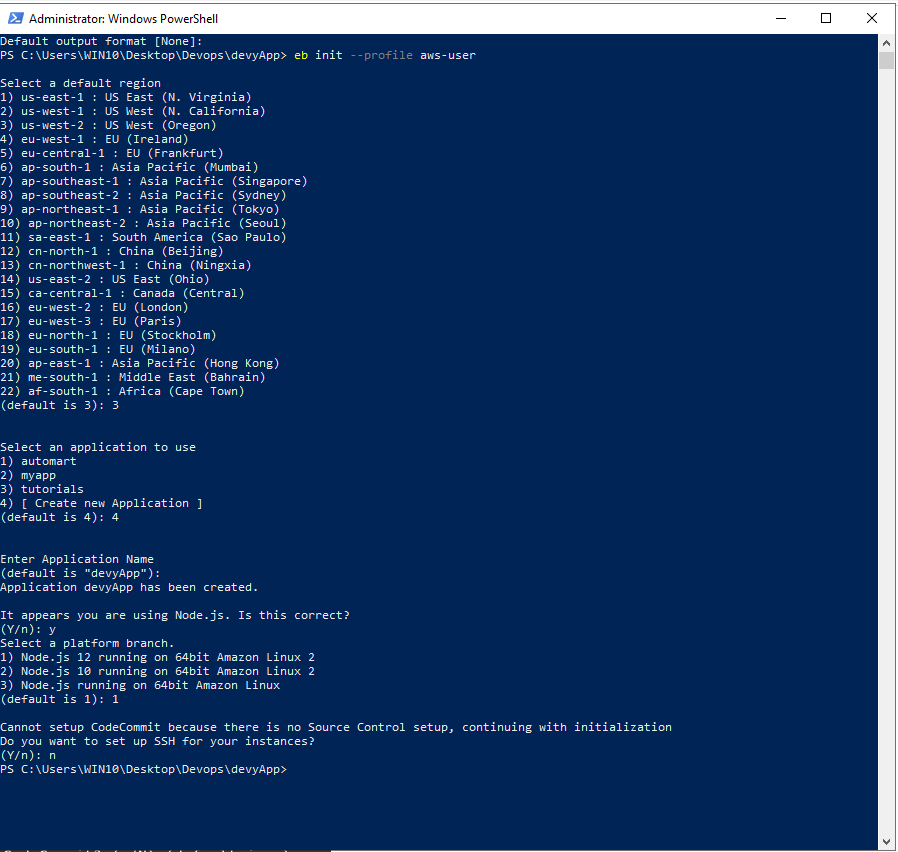
a) Initialize the NodeJS Cd into the repository on PowerShell. We will use the EB CLI to initialize the NodeJS app by using this command in the screenshot below. Follow the prompts and choose the default options. This command creates a configuration file in a folder named .elasticbeanstalk that specifies settings for creating environments for your application

b) Create an EB environment using the command eb create. This command creates a load balanced environment with the default settings for the Node.js platform and the following resources: EC2 instance, Instance security group, Load balancer, load balancer security group, auto scaling group, Amazon S3 bucket, A mazon CloudWatch alarms, Amazon CloudFormation stack and a domain name.
Make sure you have committed your changes in your repository.
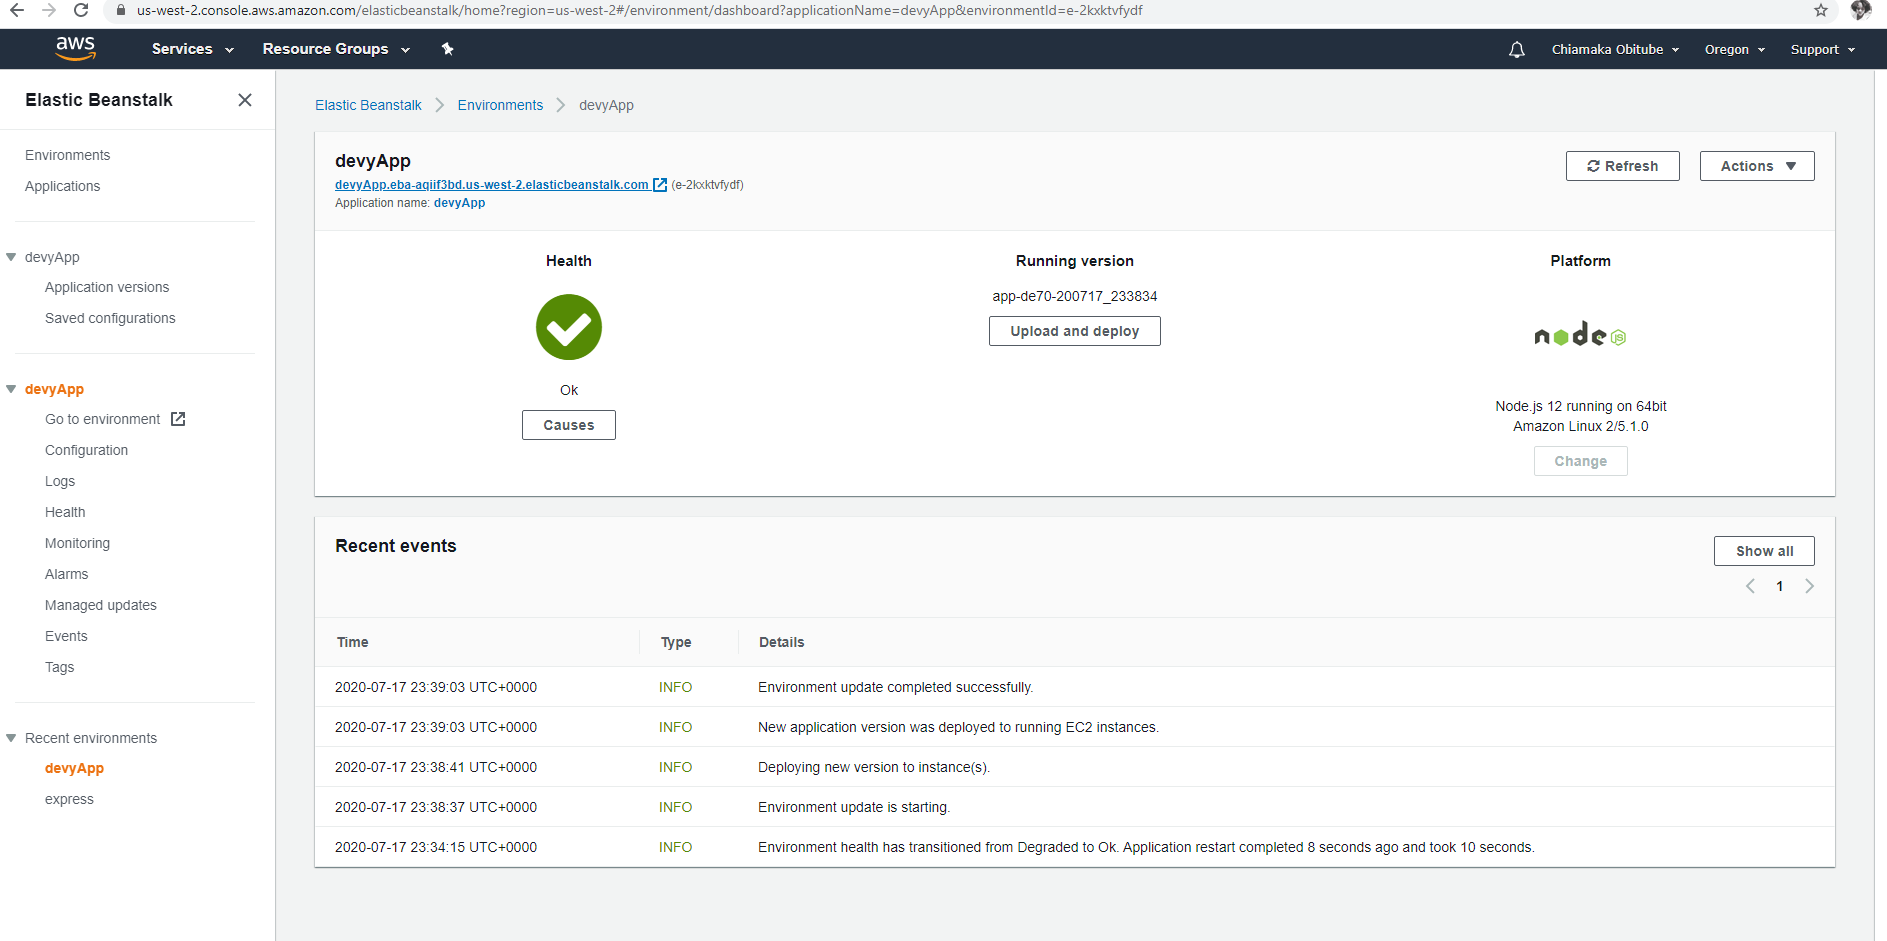
c) When environment creation completes, use the command eb deploy to deploy the application. Navigate to the AWS Elastic Beanstalk console and you will see that the environment has been created and the health status is OK.

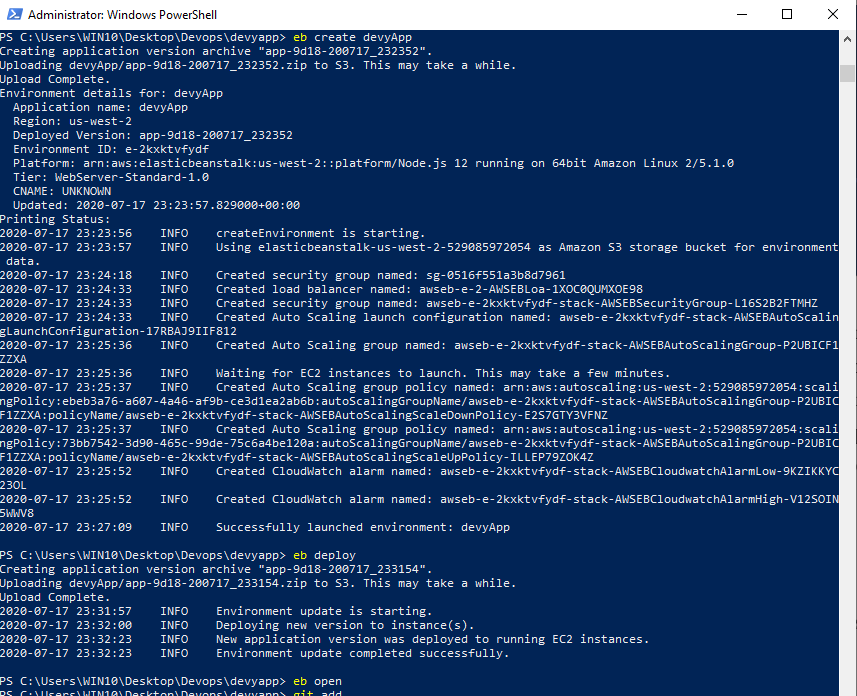

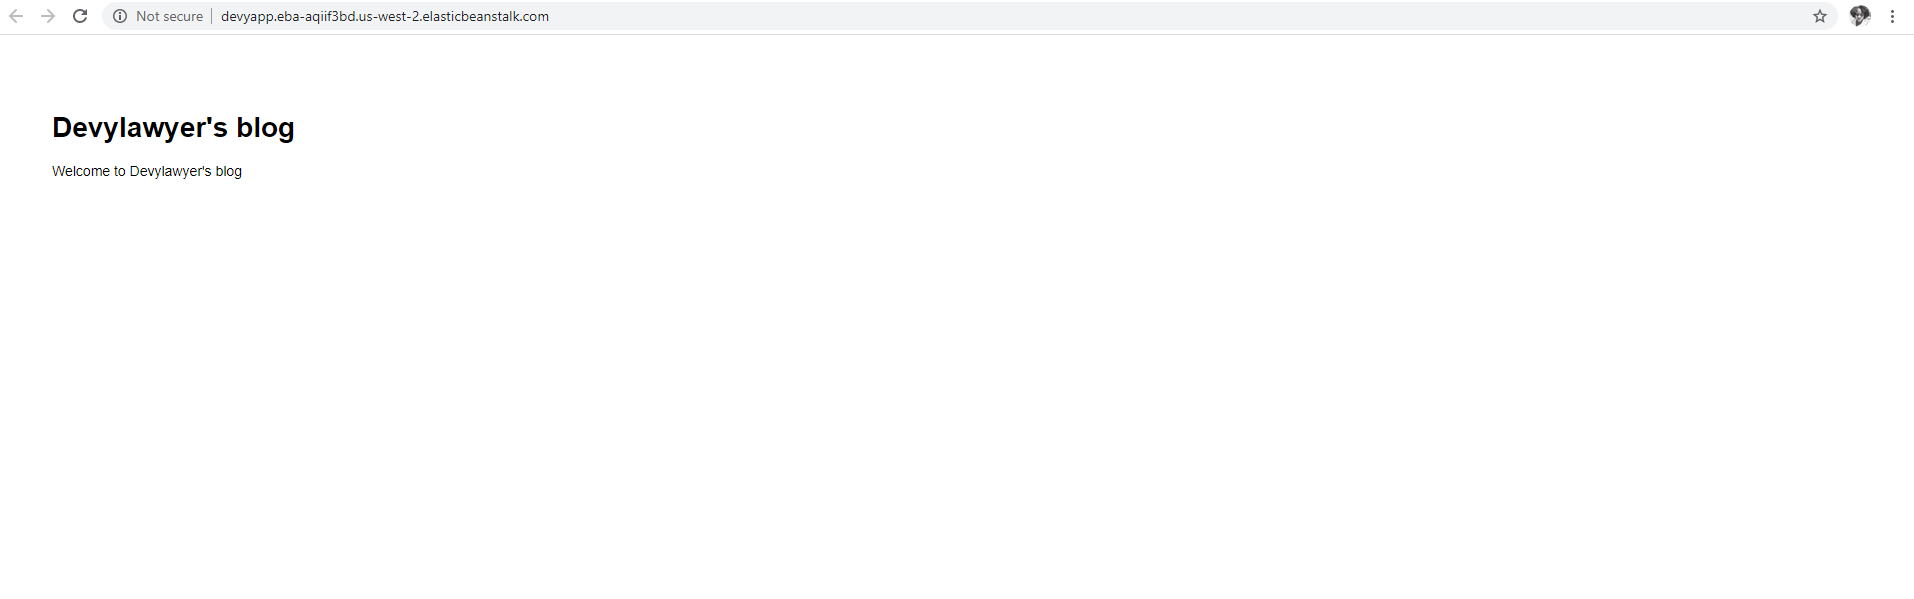
d) To open the application from the console, use eb open and the app opens in the browser in a given URL.

Conclusion
You can continue to make changes to your deployed application. For the changes to reflect, you must stage the change files, commit the changes and use the eb deploy command to update the application.