

Deploy a simple NodeJS app to AWS EC2 and get it running on a custom domain.


Deploy a simple NodeJS app to AWS EC2 and get it running on a custom domain.
In this tutorial, we are going to deploy a simple NodeJs application to an EC2 instance and having it running on a custom domain. We will use the following technologies and tools.
- Amazon Elastic Compute Cloud (EC2)
- Putty/Windows Subsystem for Linux(WSL)
- Nginx
- Amazon Route53
- Git/GitHub
Prerequisites
- A decent knowledge of Git/GitHub. Git is a free and open source distributed version control system designed to handle everything from small to very large projects with speed and efficiency. You can learn about it here — https://git-scm.com/
- AWS Account. As a new user, you can get 12 months of free services offered within AWS.
- A Command line tool. For Windows users, you can use PowerShell or Git Bash. For Mac users, the terminal works just fine.
Part 1: Create a NodeJS application and push to GitHub.
a) First step is to install NodeJS on your computer. NodeJs comes with the node package manager NPM and can be downloaded here.
b) Initialize an empty Git repository using the command git init.
c) Create a file named .gitignore and add the node_modules directory to it. These files will be excluded from being added to the repository when pushed to GitHub or cloud.
Create a sample express application from https://expressjs.com/en/starter/generator.html or running the commands below
express sampleApp cd sampleApp npm install npm start
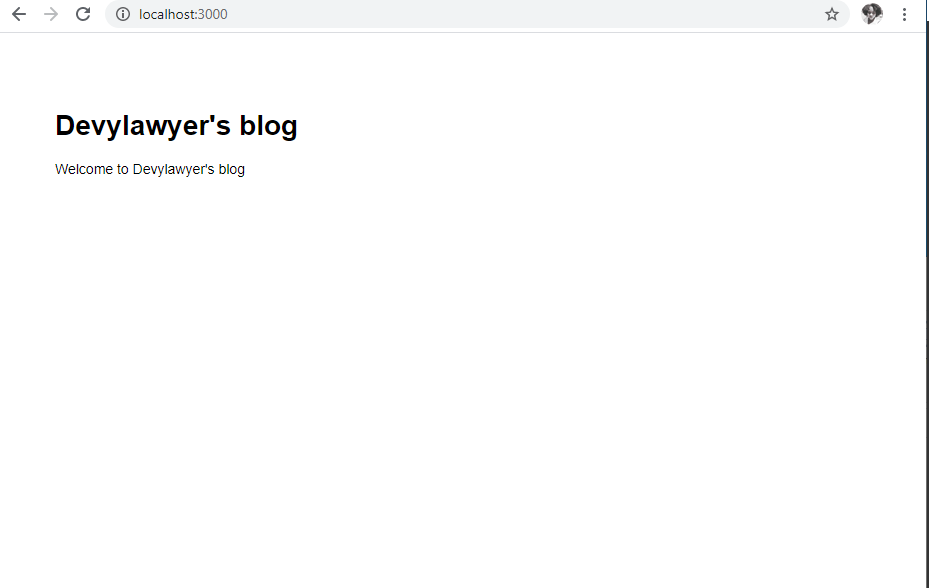
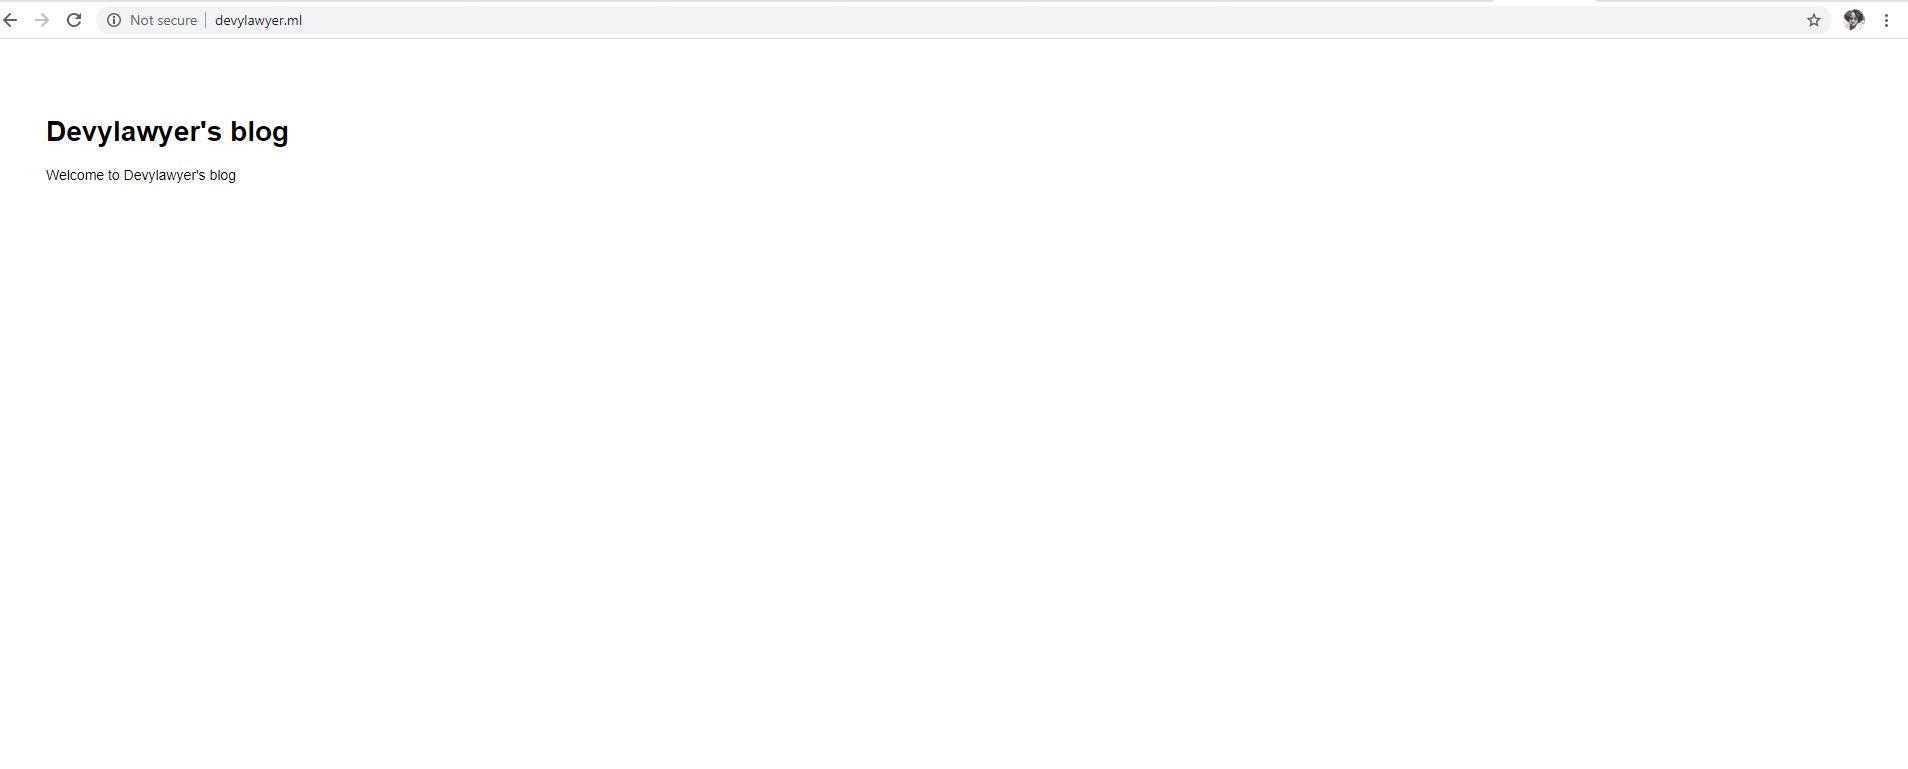
I have create a sample express application called Devylawyer’s blog and it is running locally.

Push the application to GitHub by running these commands
**$ git init
$ git add .
$ git commit -m “First commit”
$ git remote add origin <remote repository URL>
$ git push origin master
Part 2: Launch an EC2 Instance and SSH into it.
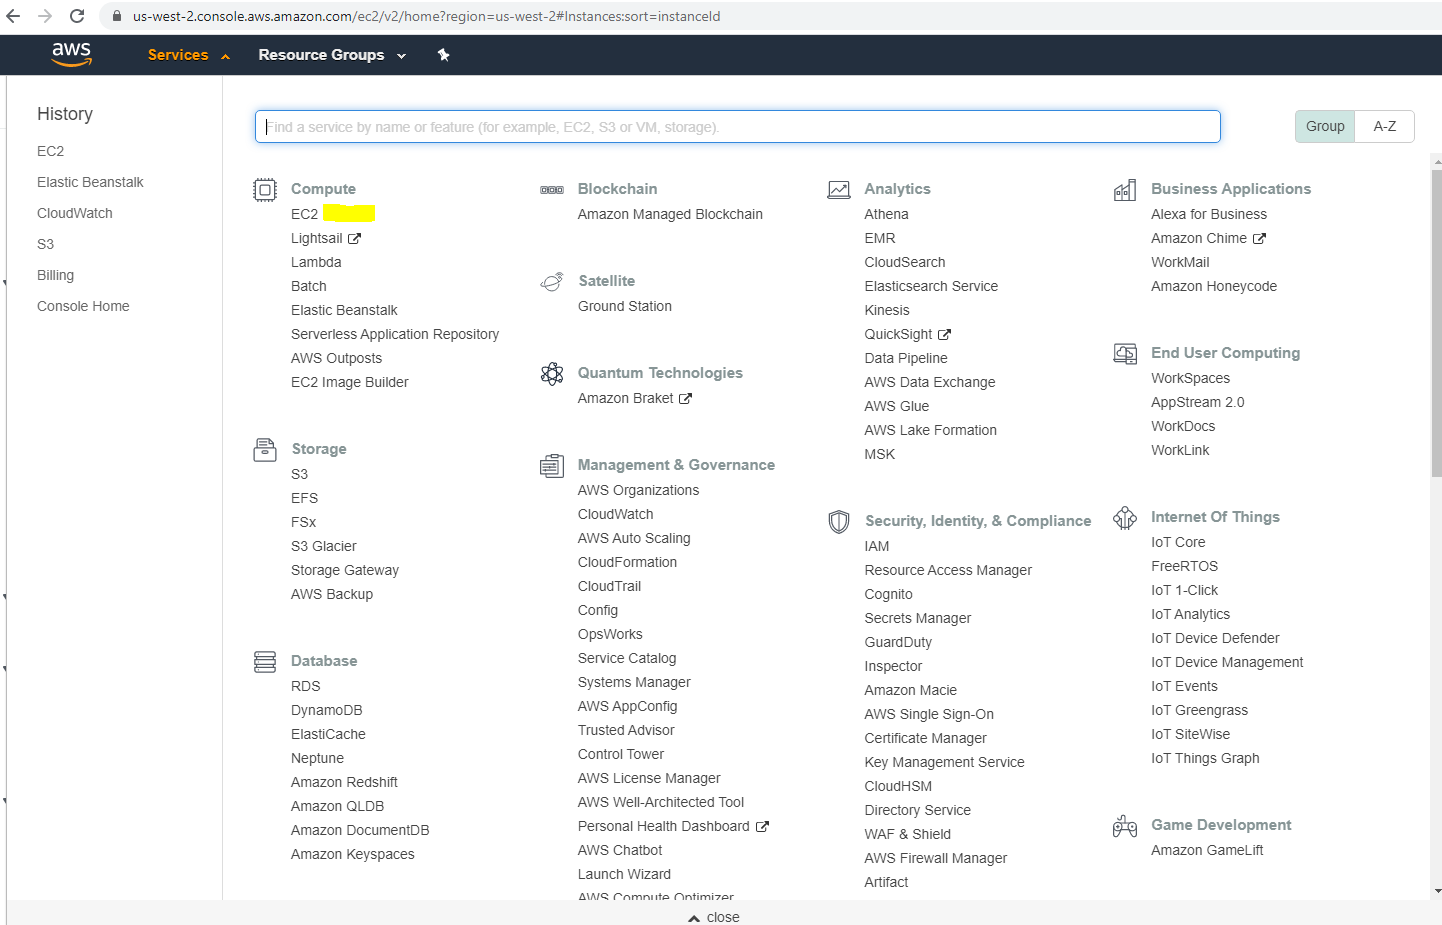
Log in to the AWS Management Console and select EC2.
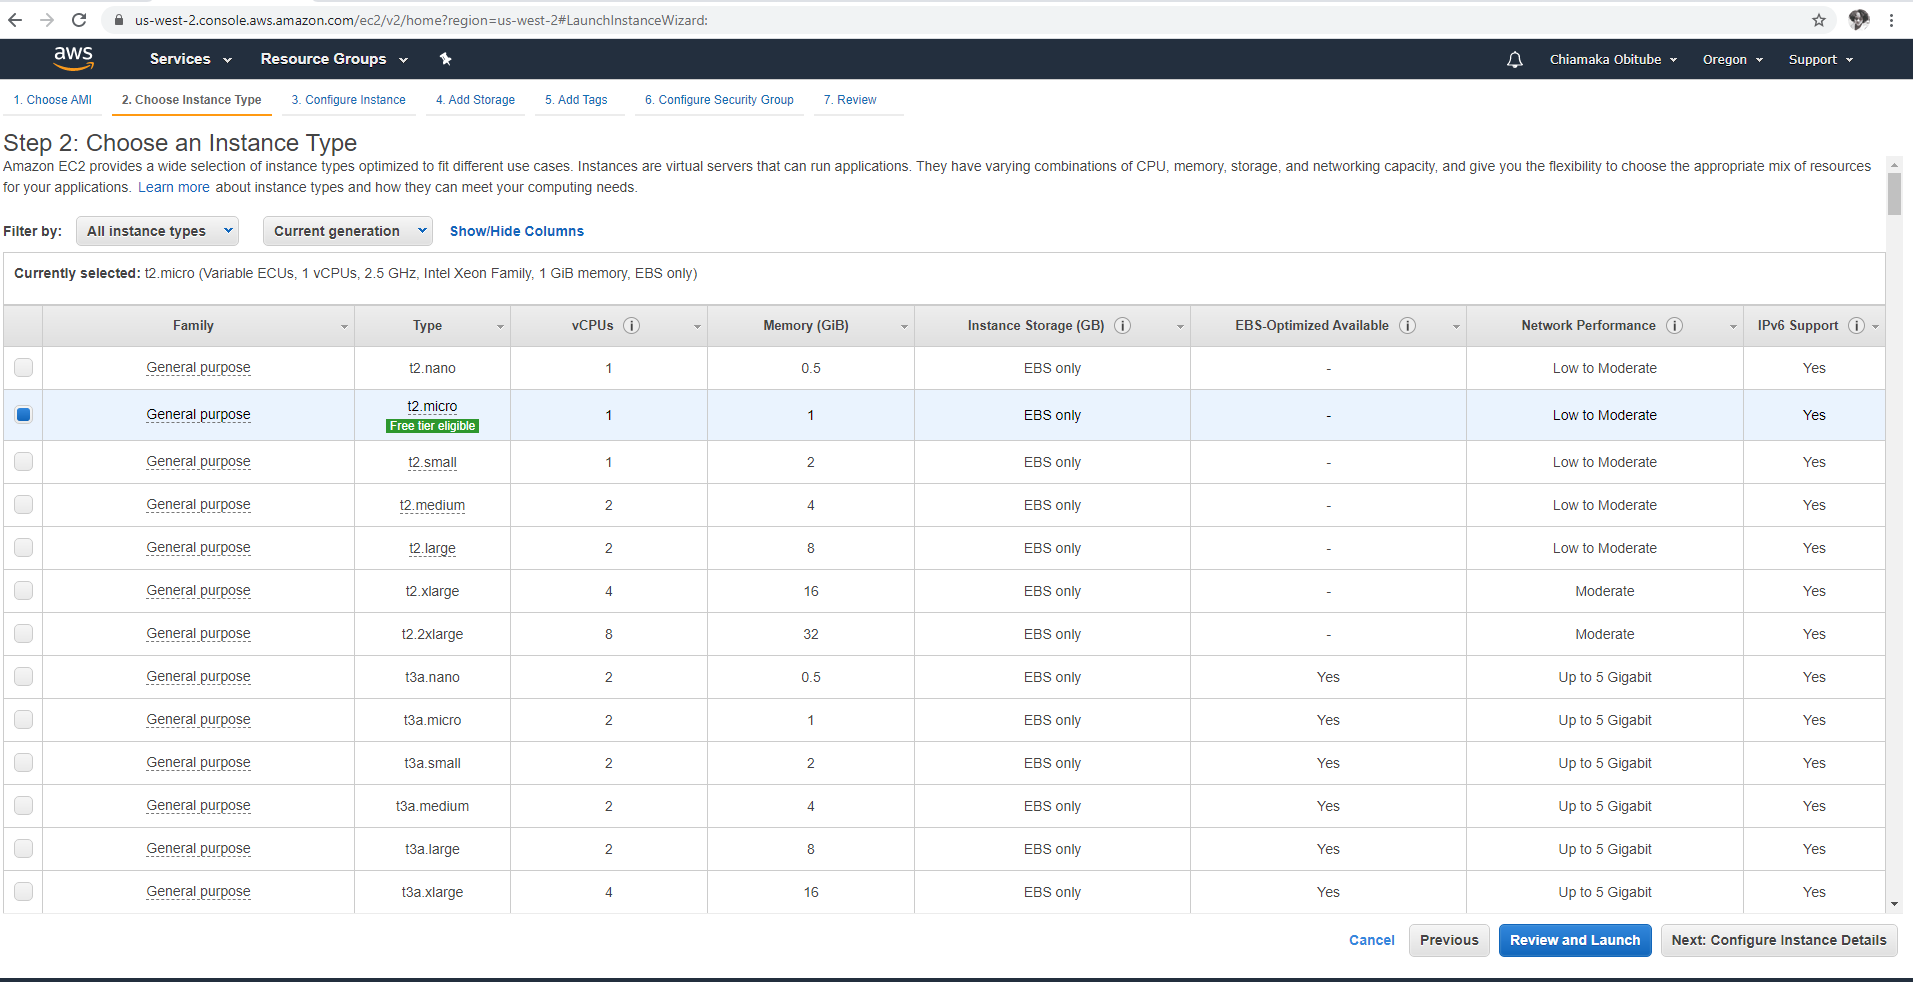
To create an instance, Click on Launch instance and add an instance by selecting any of the available instances.
For this tutorial, I selected the Ubuntu image which is eligible for free tier and click on Review and Launch.
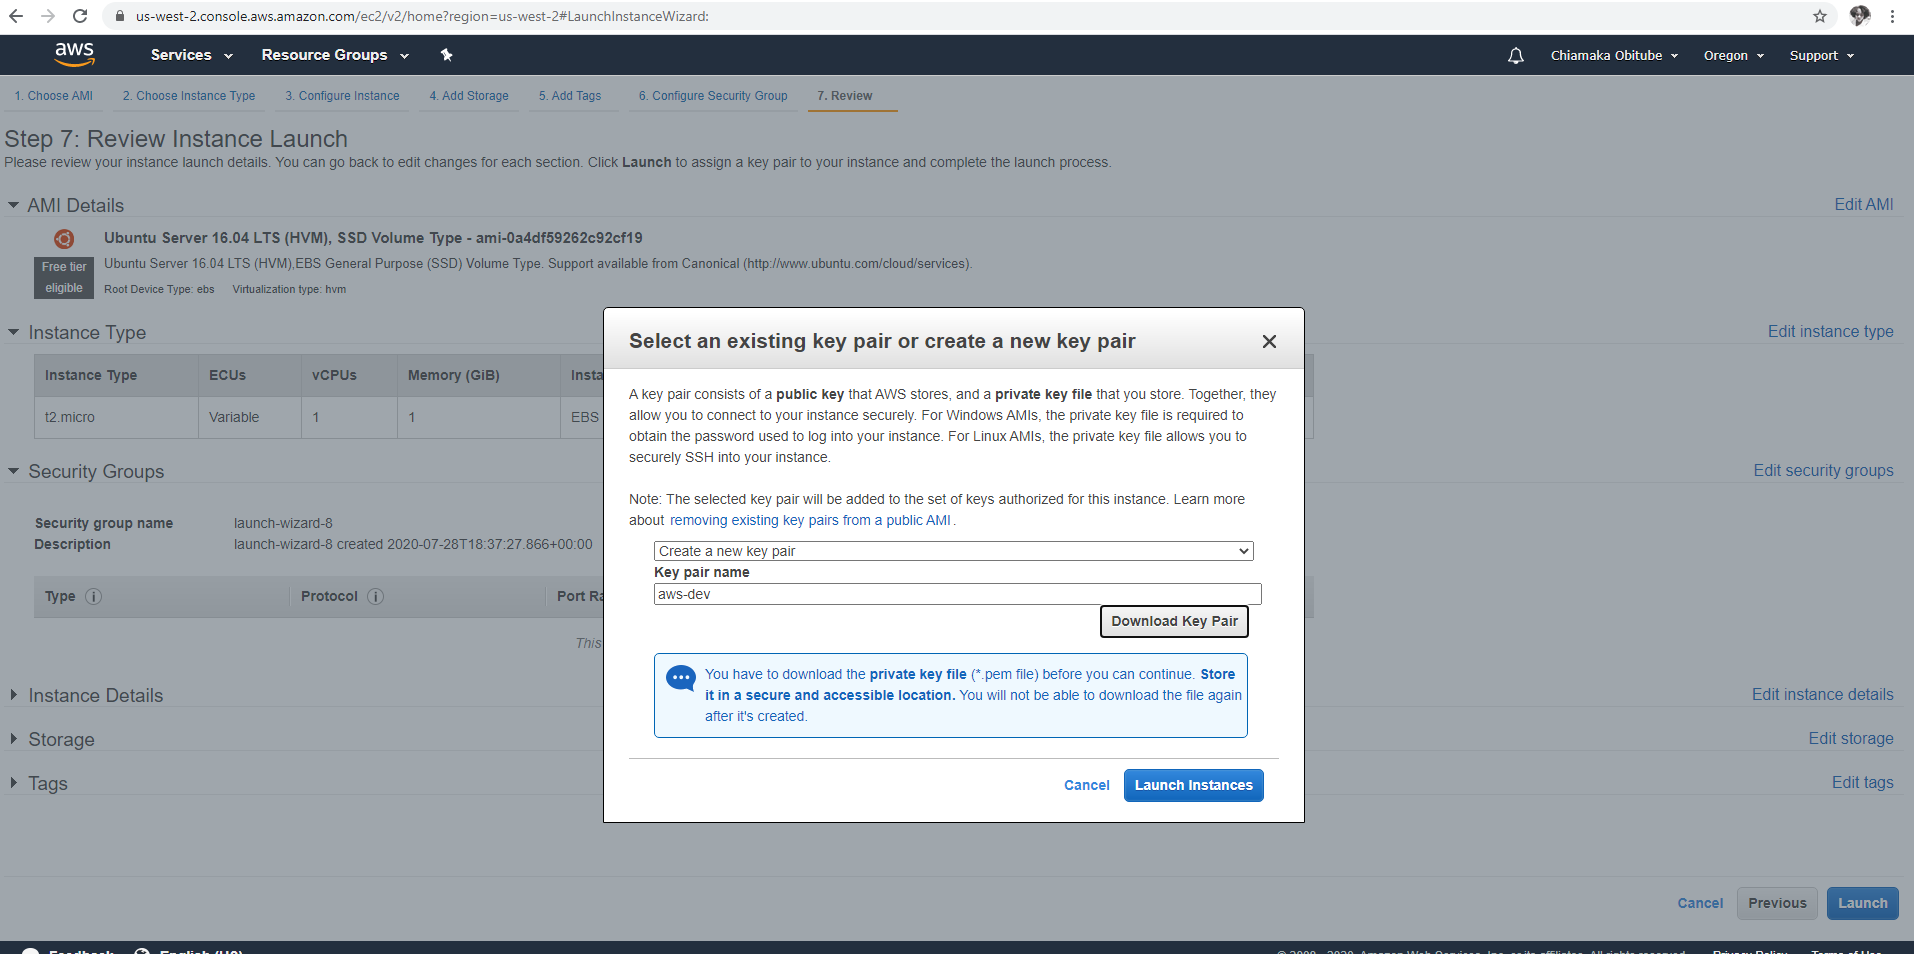
You will be asked to provide a keypair name. This keypair will be downloaded and will contain the credentials to SSH into the instance.
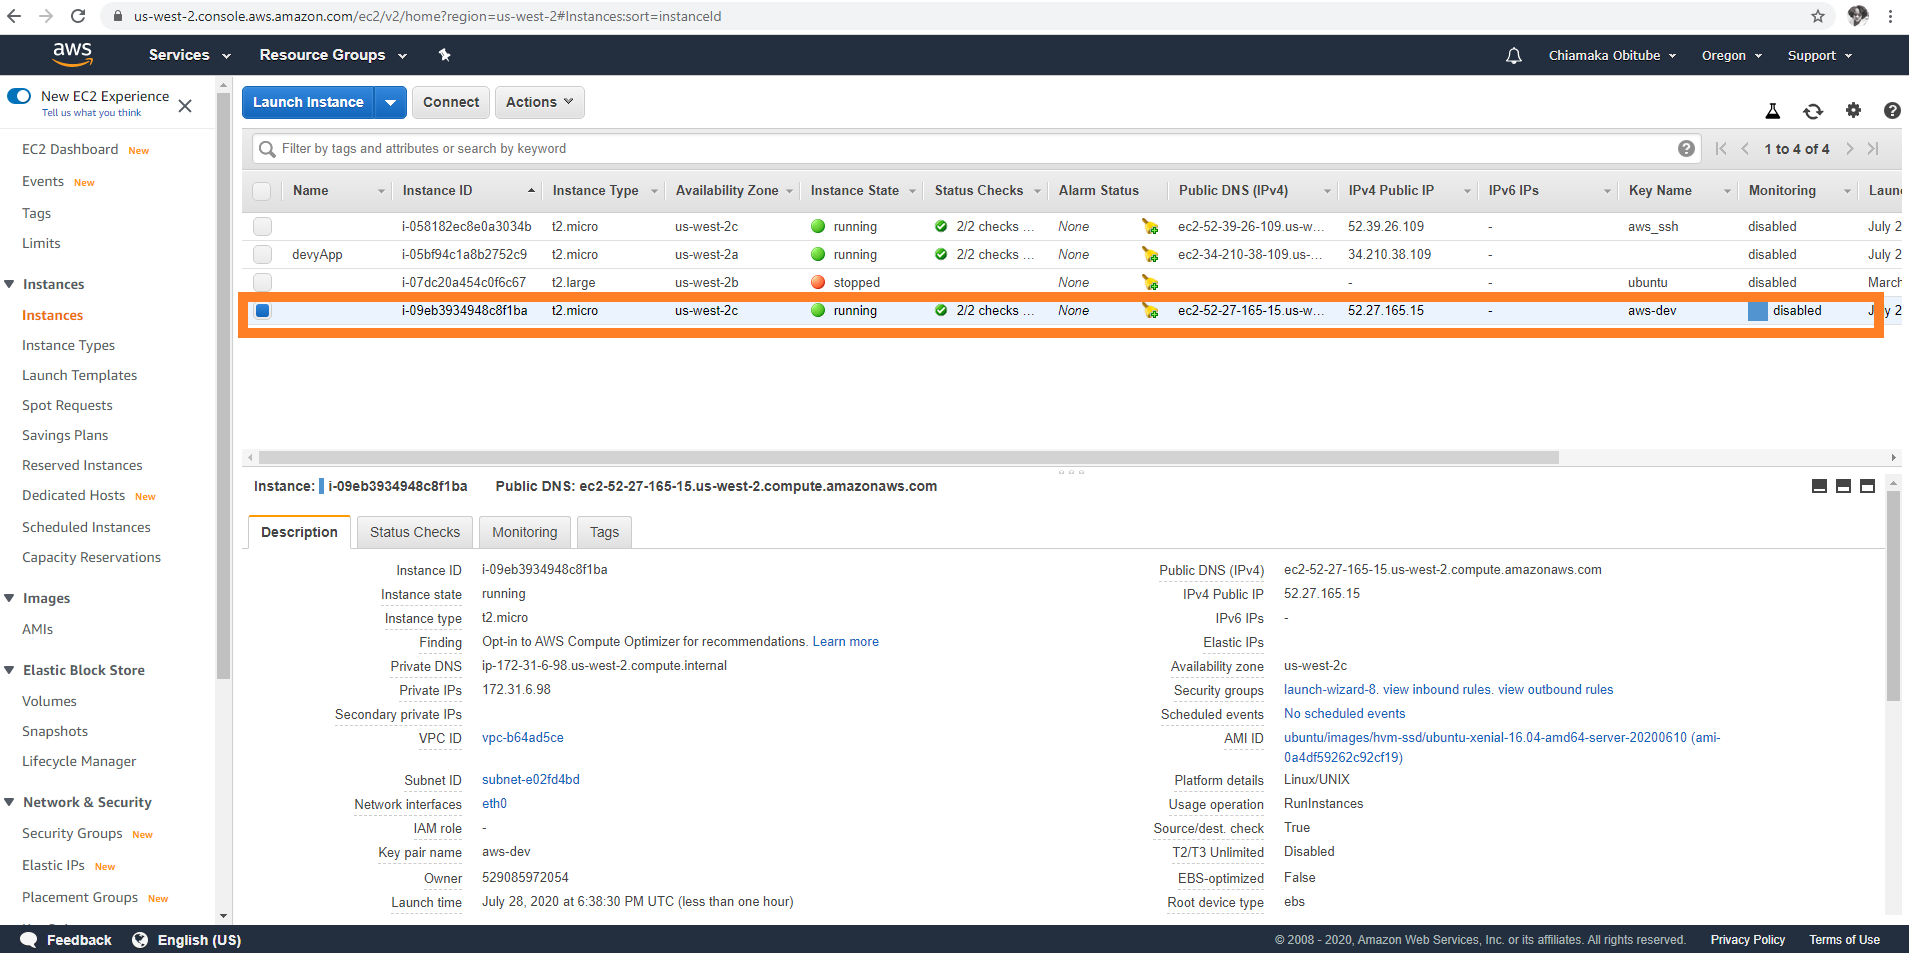
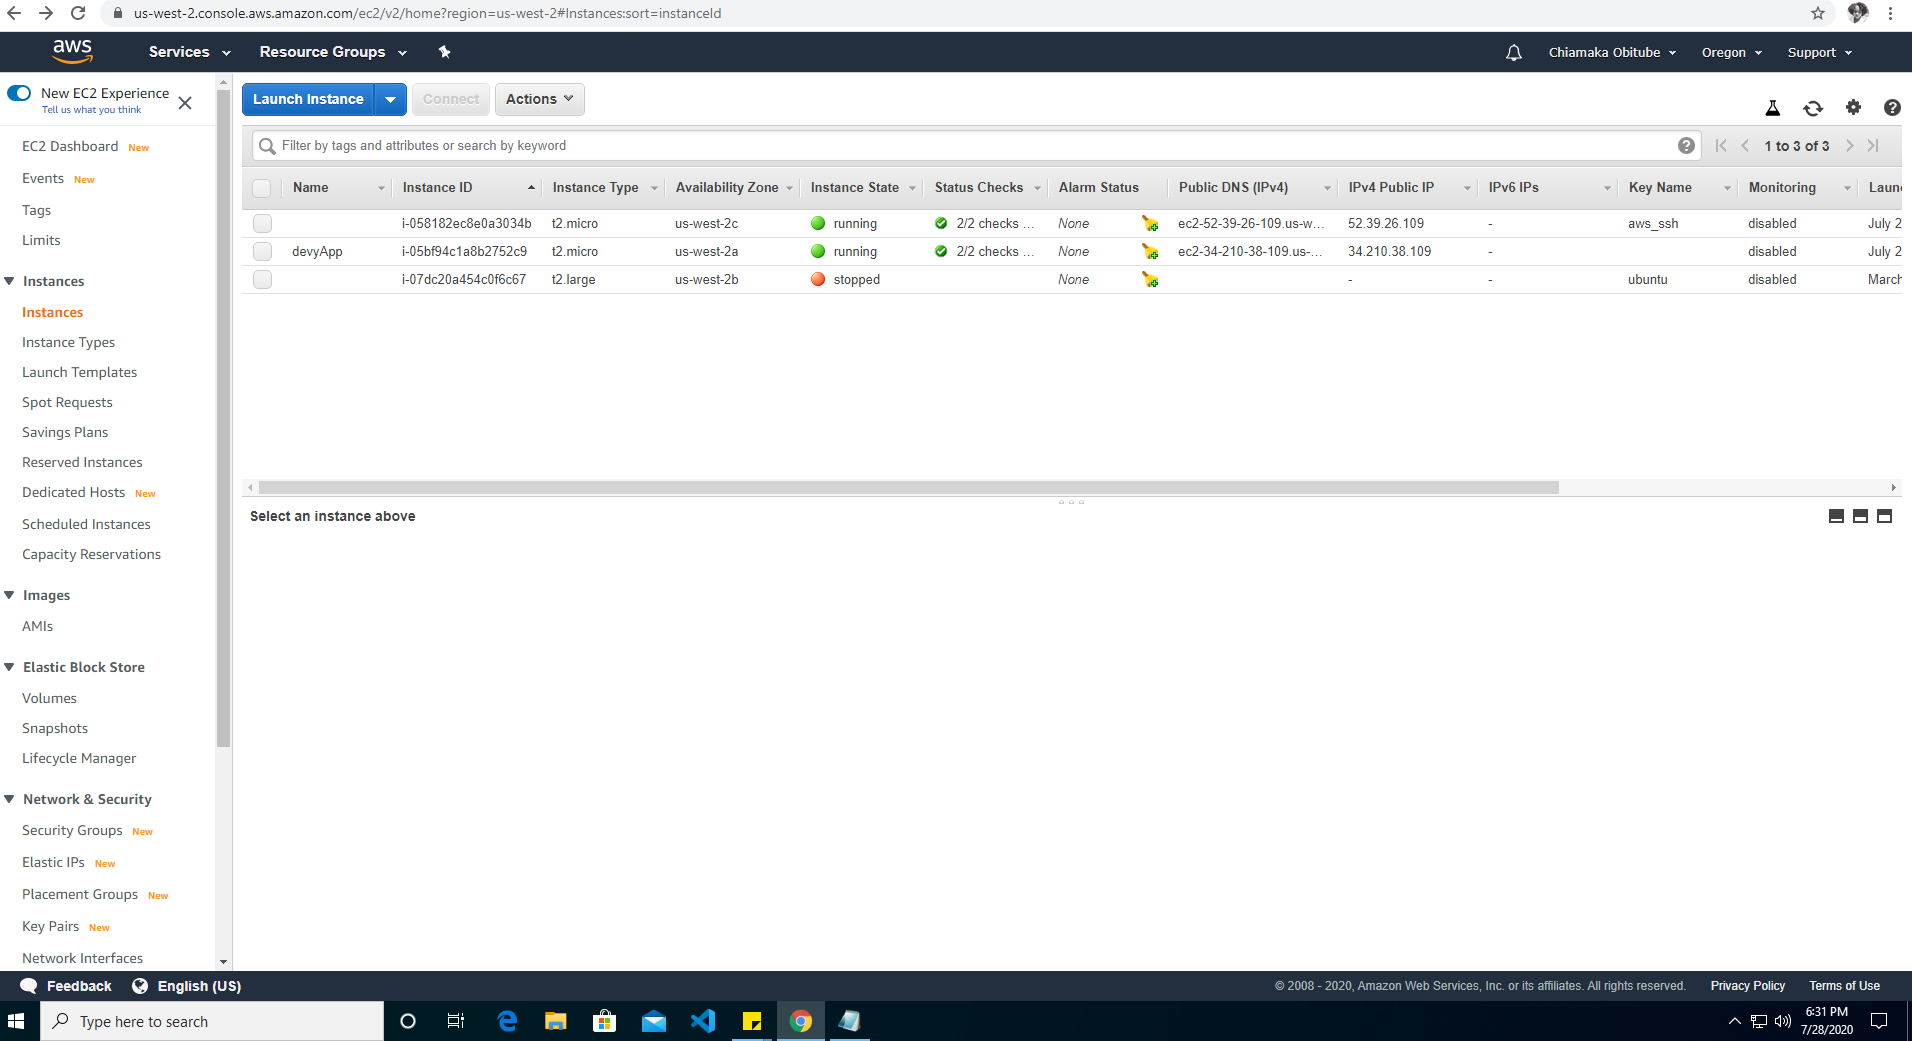
Launched instance running
The default configuration settings will be provided on the instance. Now that our instance is up and running we are going to connect to the instance. I am using a Windows machine. I am using Windows Subsystem for Linux (WSL) gotten from the Windows Store. The Windows Subsystem for Linux lets developers run a GNU/Linux environment — including most command-line tools, utilities, and applications — directly on Windows, unmodified, without the overhead of a traditional virtual machine or dualboot setup. Instructions on how to SSH into the instance can be found on the Connect button of the EC2 instance or here -
Part 3: Associate an Elastic IP address to the EC2 Instance
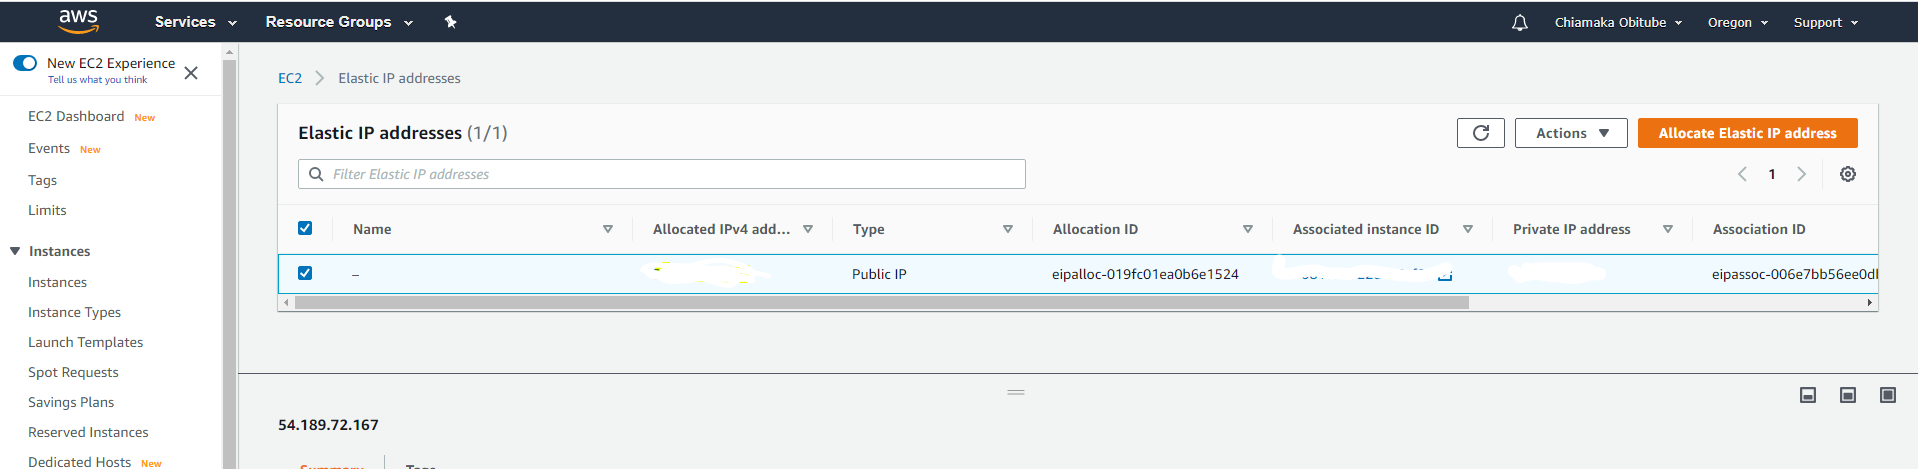
An Elastic IP address is a reserved public IP address that you can assign to any EC2 instance in a particular region, until you choose to release it. When you stop and restart your instance, your IP address will still be associated with your instance. When you associate an Elastic IP address with an EC2 instance, it replaces the default public IP address.
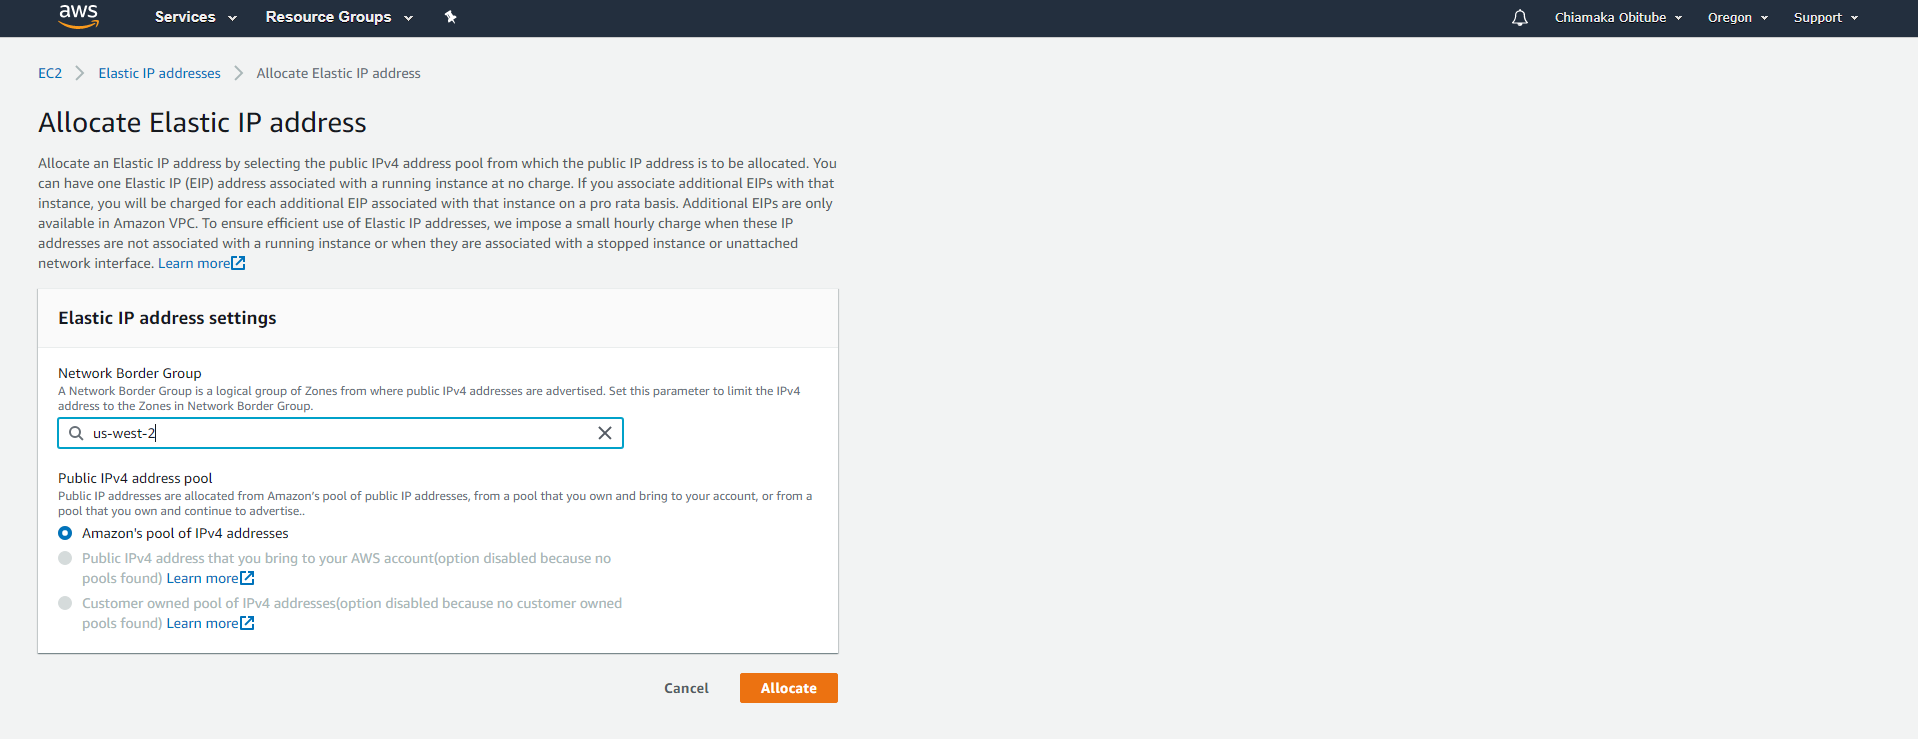
- In the navigation pane, choose Elastic IPs andclick Allocate Elastic IP address. The Elastic IP address will be allocated in your current region (Network Border Group). If you choose to use any region, you can select your preferred region.
- Select the Elastic IP address to associate and choose Actions, Associate Elastic IP address.

- Select the instance from Instance and then choose Associate.
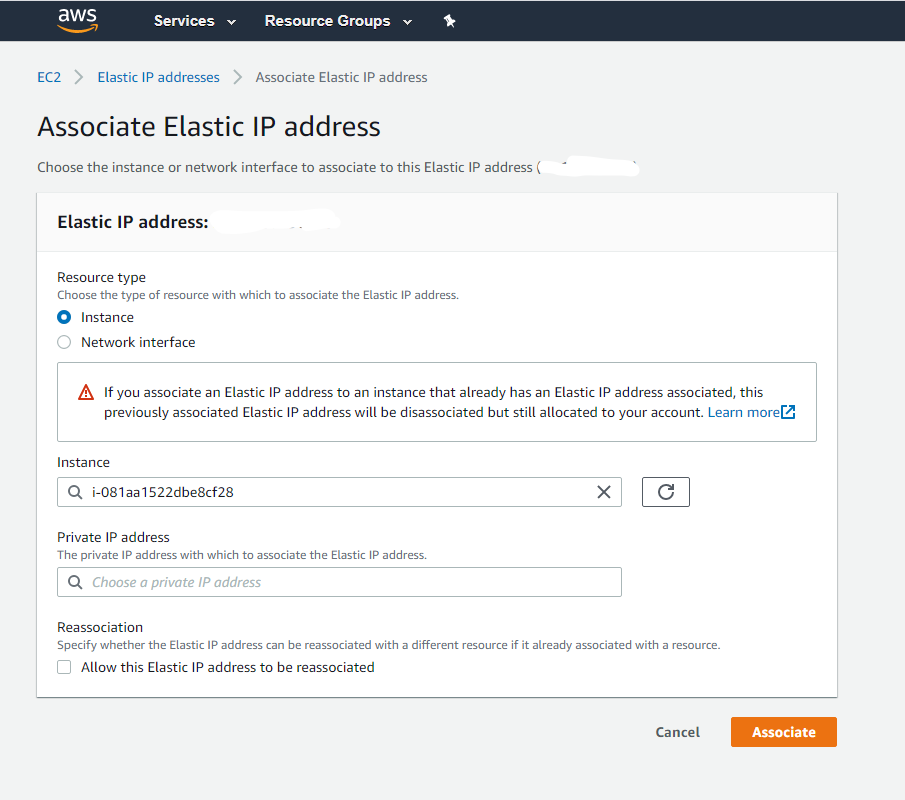
Now, when you go to your EC2 instance, the public IPV4 address will be the Elastic IP.
Part 4: Deploy the NodeJS app on the EC2 instance.
Now, I am connected to my EC2 instance and I will install NodeJS, clone the GitHub repository where our NodejS App is and install dependencies needed to run the application on the server.
- Clone your github repo
git clone <YOUR_GITHUB_REPO_URL>
- Install NodeJS and confirm that it is installed
curl -sL [https://deb.nodesource.com/setup_lts.x](https://deb.nodesource.com/setup_lts.x) | sudo -E bash -
sudo apt-get install -y nodejs
- Install all dependencies needed to run the application and start the application
npm install
npm run start
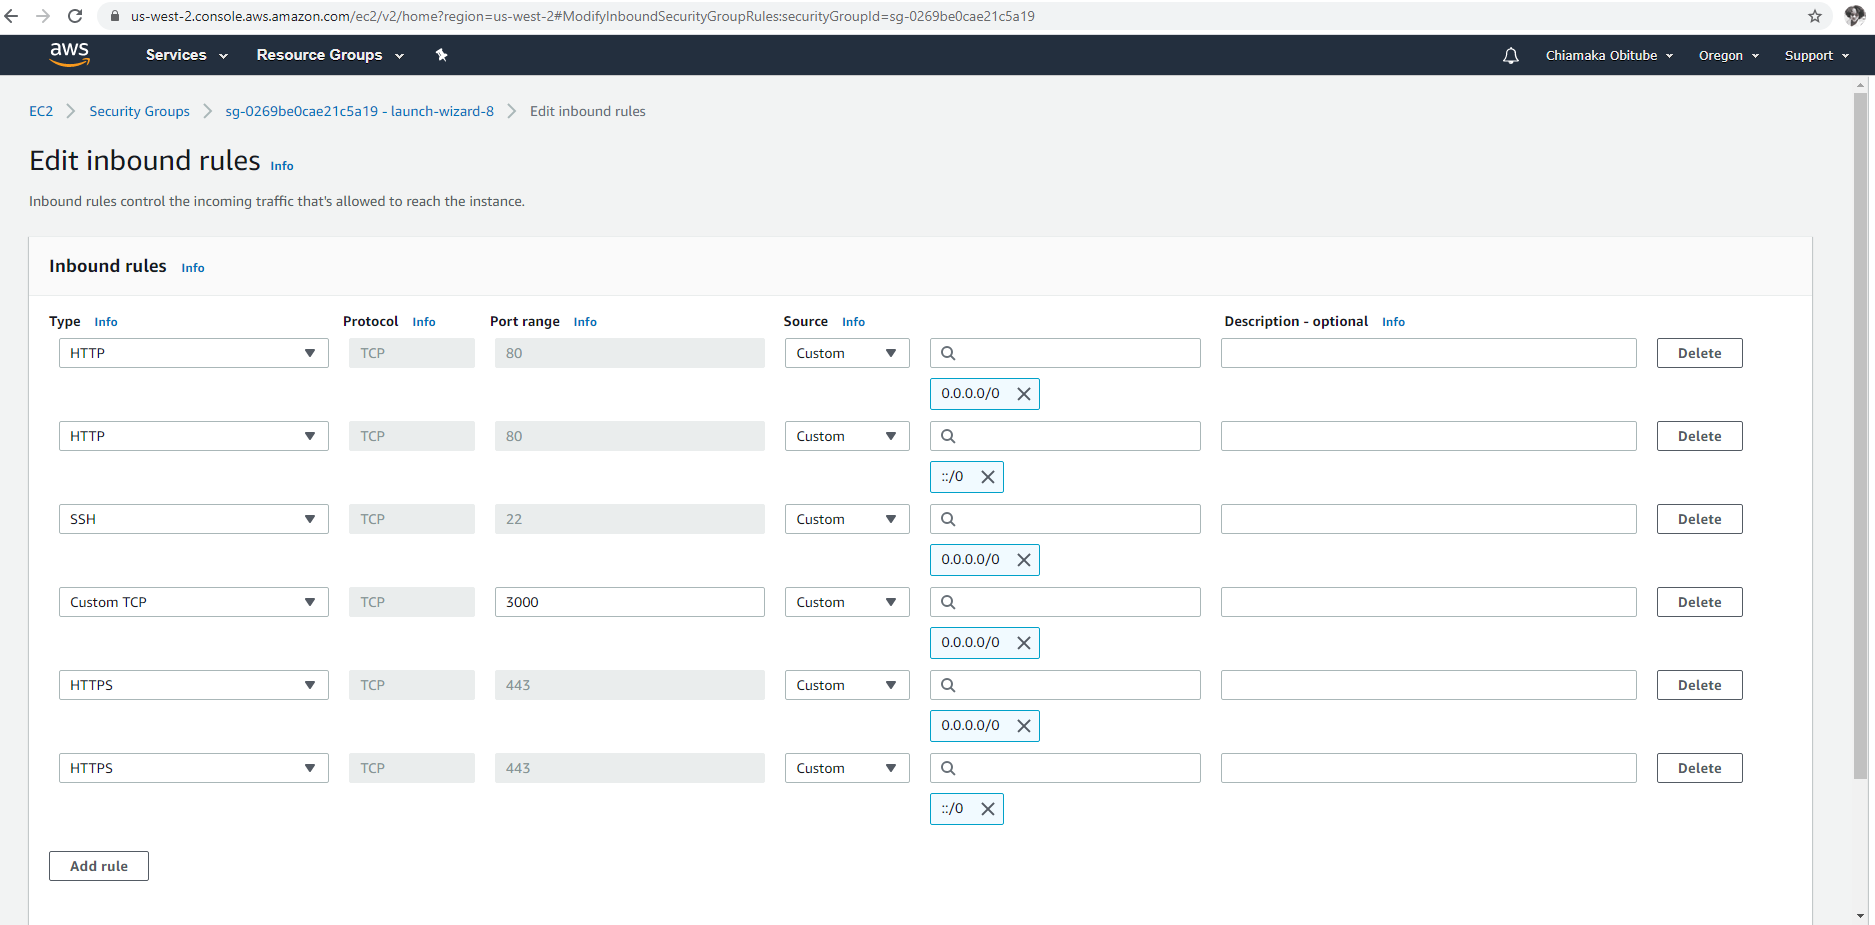
If we try to visit the application using the Public DNS IPV4 url, we will get an error. To fix this, we have to go to the EC2 instance and edit the security groups by adding inbound rules that will enable our application to be available to the public via the port.

PublicDNS
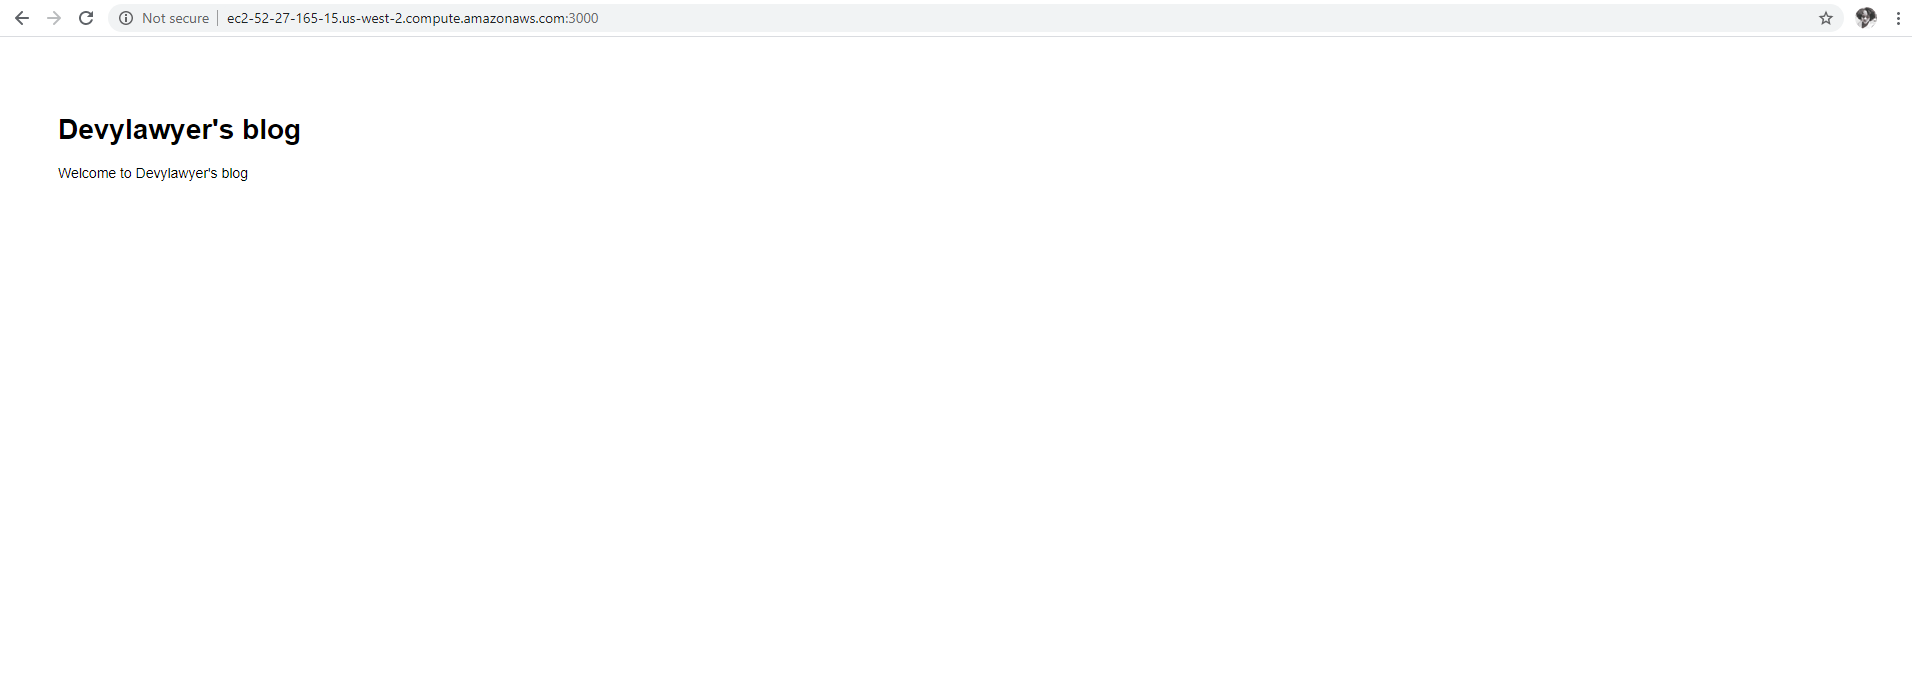
Now when we try to access our application using the port 3000, our application will now be visible.
Now, once we stop the terminal, the application will stop running. We need to have this application running forever even when we stop the instance. To achieve this, we will need PM2. PM2 is a daemon process manager that will help you manage and keep your application online. Getting started with PM2 is straightforward, it is offered as a simple and intuitive CLI, installable via NPM. Basically, this allows your application to be continually available even when you have closed your terminal. If you want to read more about PM2, click here.
- Run this command to install and start the application
$ sudo npm install pm2@latest -g
$ pm2 start dist/bin/www
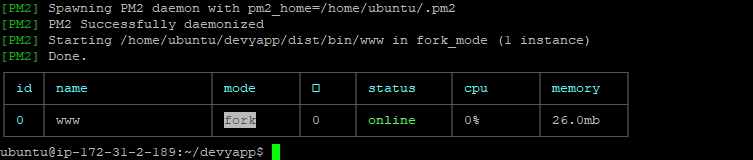
Now, when we stop the terminal, the application will ensure our app stays online as long as the instance is running.
To ensure that the application automatically keeps running when the instance restarts, run these commands:
$ pm2 startup
$ sudo env PATH=$PATH:/usr/bin /usr/lib/node_modules/pm2/bin/pm2 startup systemd -u ubuntu --hp /home/ubuntu
$ pm2 save
The last 2 commands will save a startup script that will be configured for your OS so that when the system boots, the application is automatically up and running.
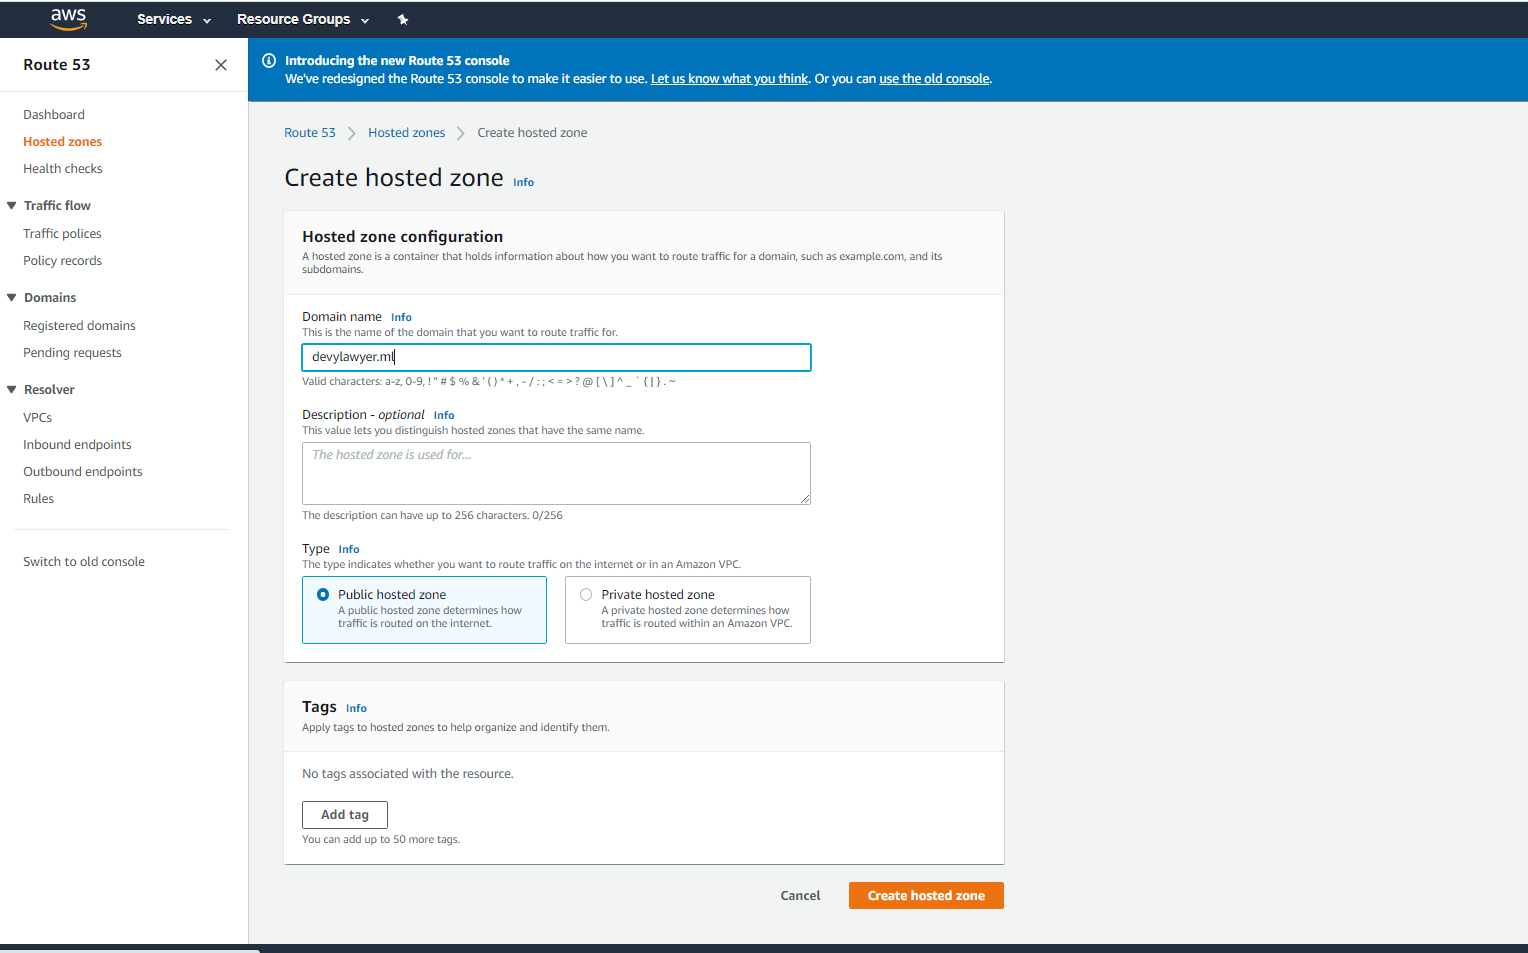
Part 5: Buy a custom domain and create a Hosted Zone on AWS Route 53.
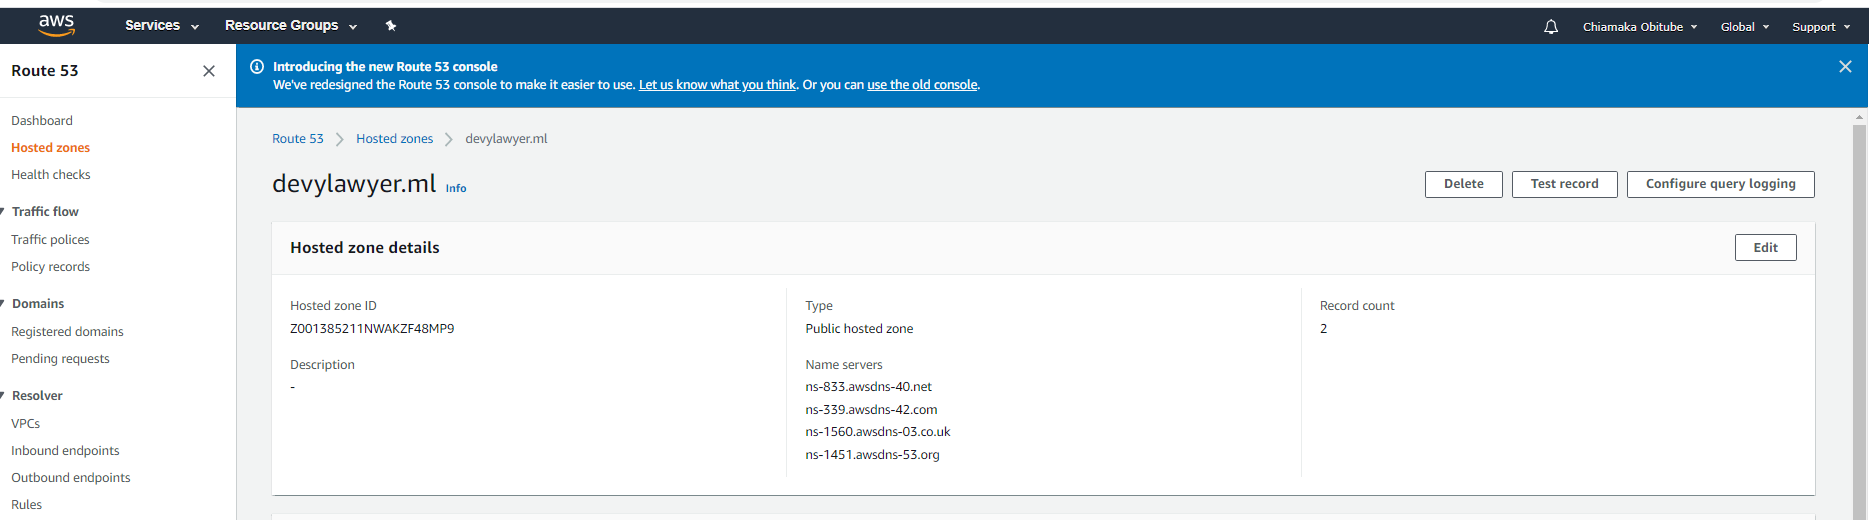
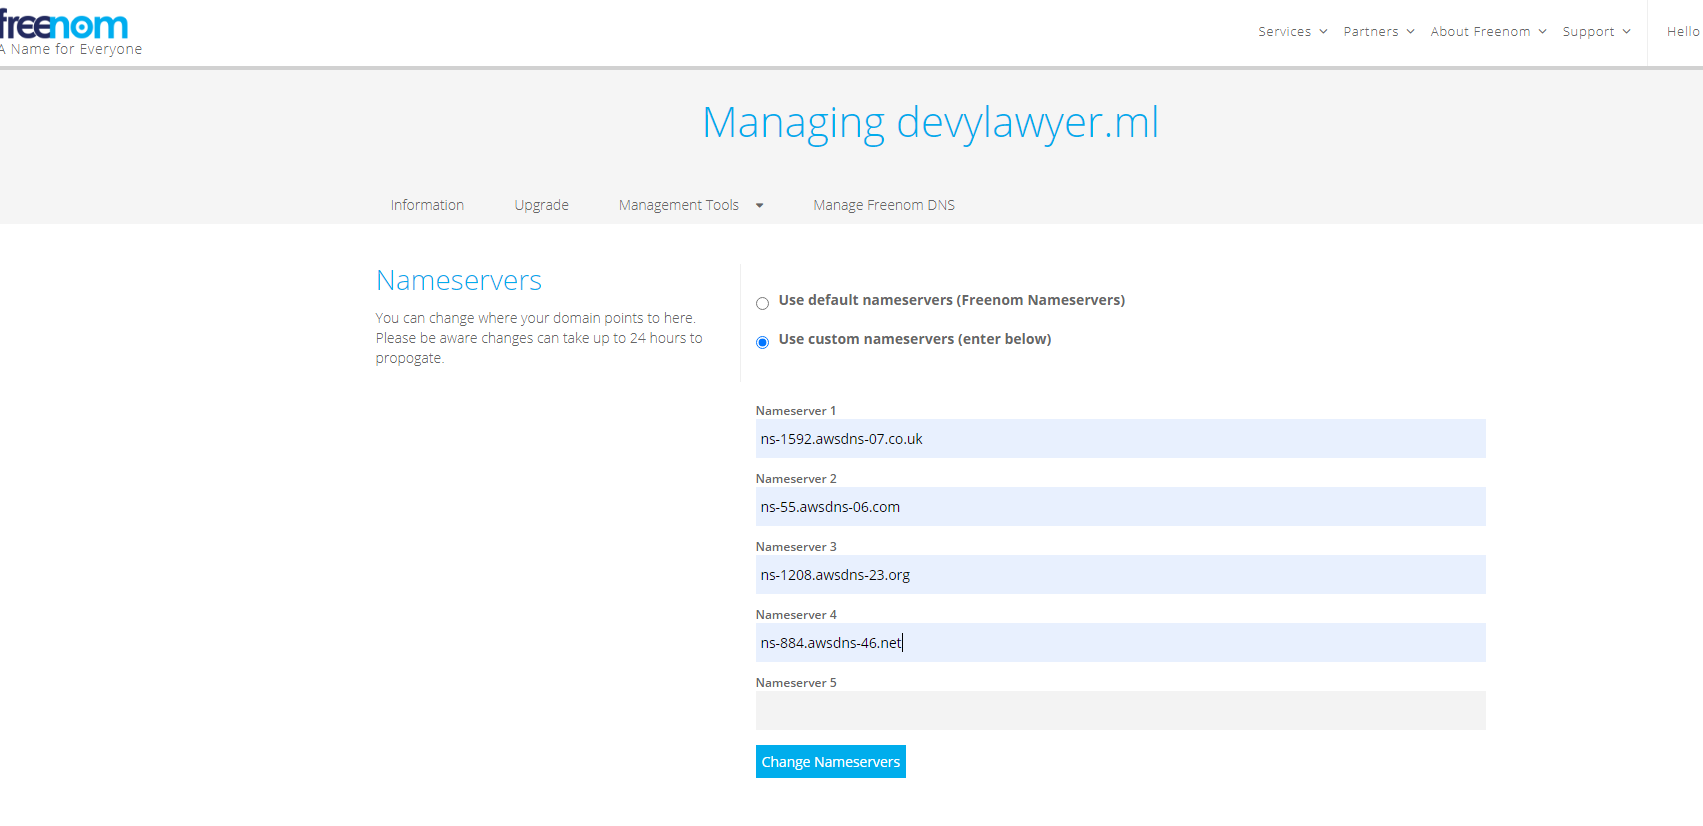
We are going to get a free domain from freenom.com. Freenom provides you with free domain for 12 months. I already have a domain devylawyer.ml and I am going to create a hosted zone in Route53.
Now that it has been created, copy the NameServers and update same in your DNS provider record.
Next create an A Record set with Value as your EC2 public IP address. Best practice is to use an Elastic IP Address.
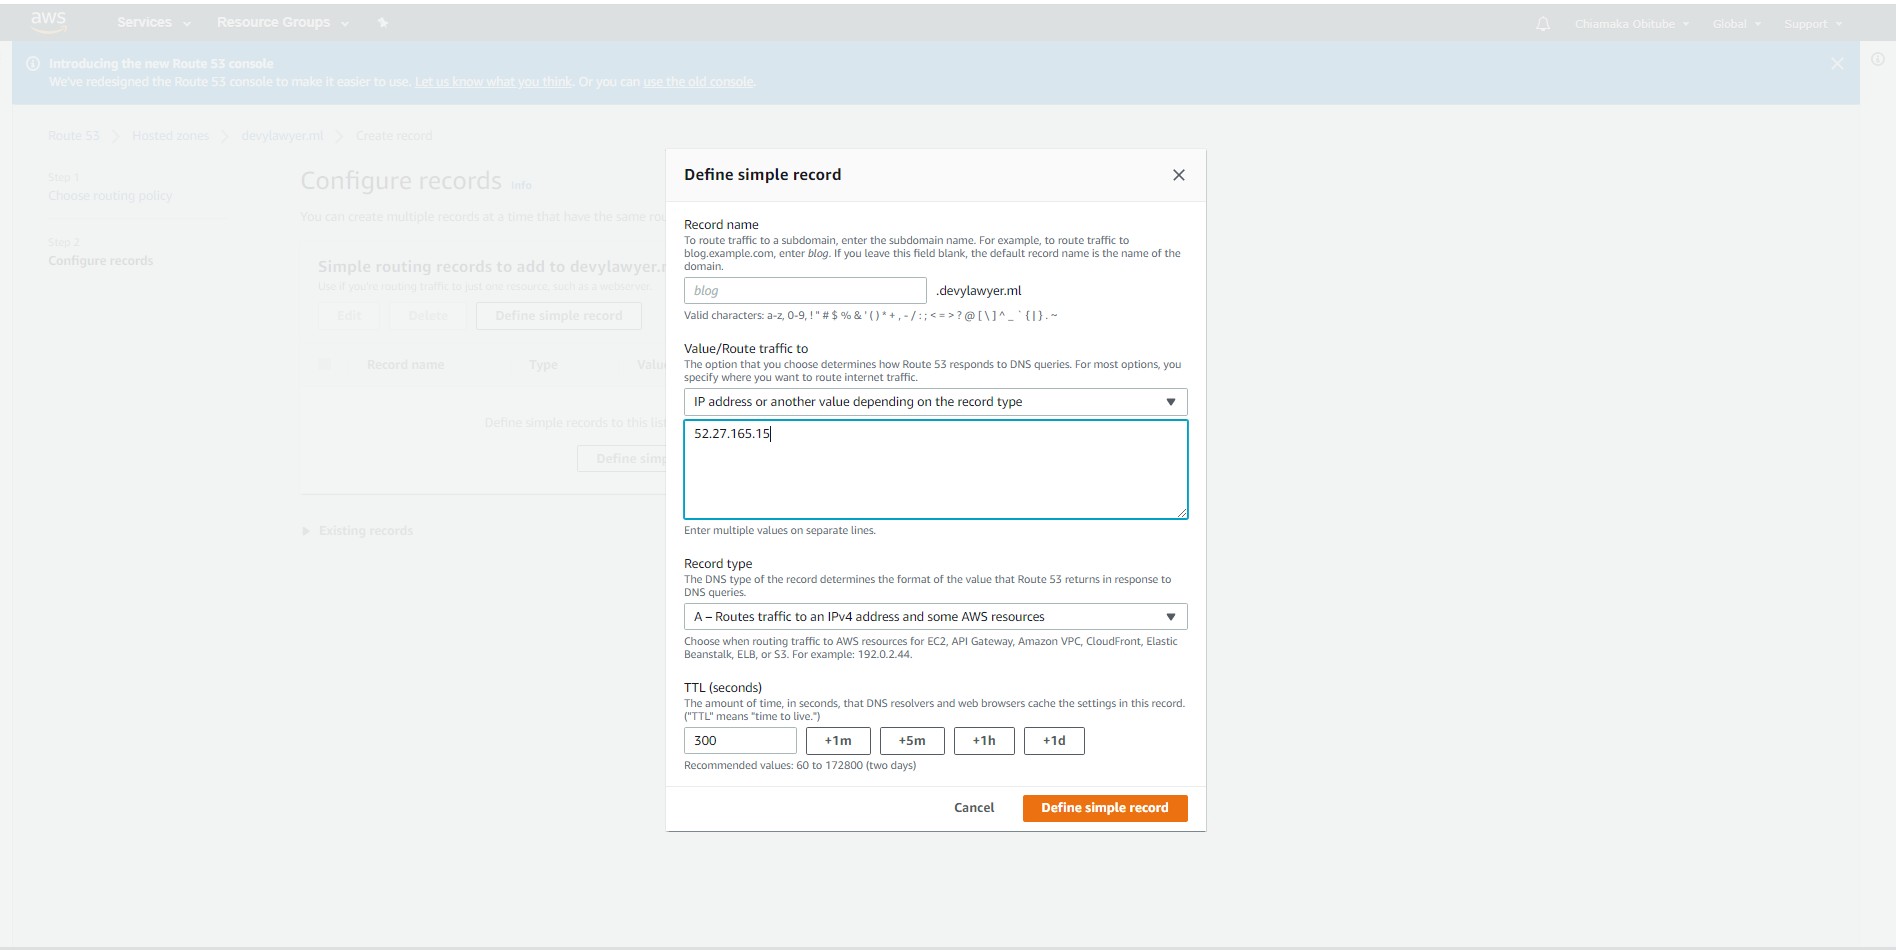
A record pointing to the public IP.
Part 5: Setup NGINX server
Now, we are able to access our app by going to . We don’t want users to have to put in :3000 when they want to visit our app. We need to make it accessible by just going to the DNS name. To achieve this, we will use NGINX.
NGINX is a free, open-source, high-performance HTTP server and reverse proxy, as well as an IMAP/POP3 proxy server. NGINX is known for its high performance, stability, rich feature set, simple configuration, and low resource consumption. In essence, ngnix will make our app available on the standard port 80 that serves HTTP requests.
- Install Nginx
sudo apt-get update
sudo apt-get install nginx
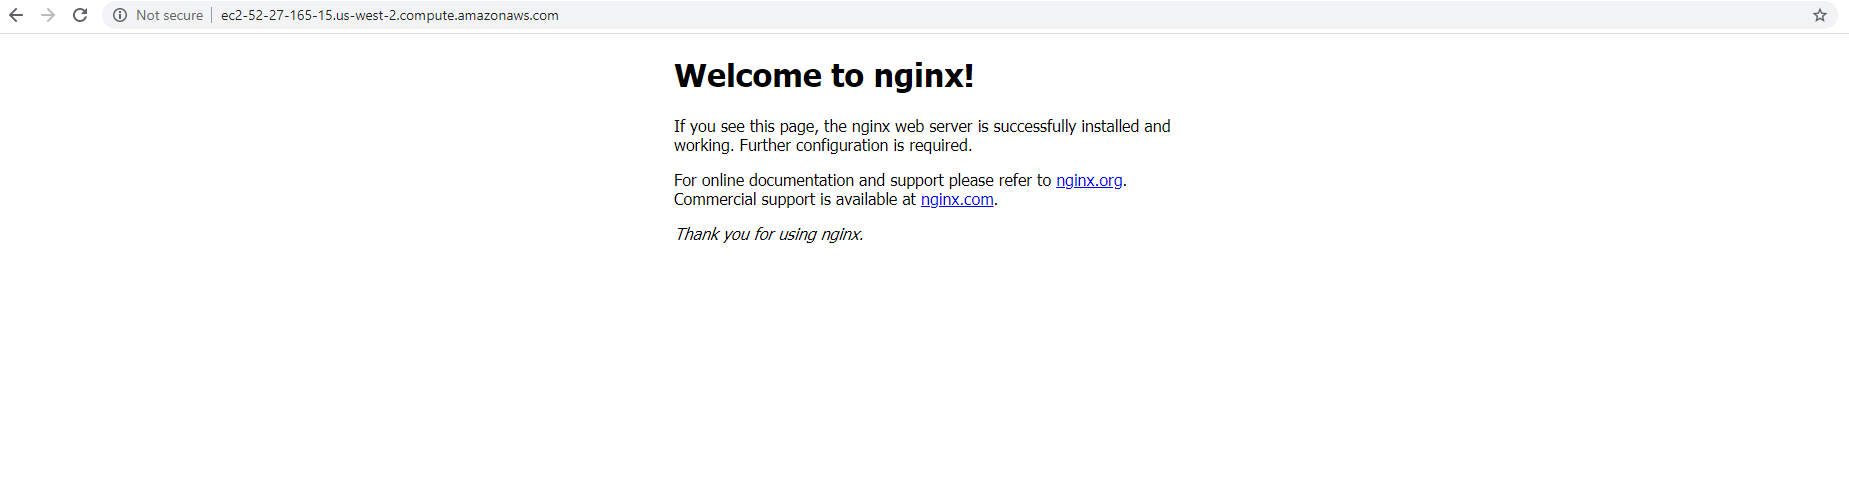
Now when we navigate to our Public DNS URL without the port, we will be served with the nginx home page.
Remove default config file
sudo rm /etc/nginx/sites-enabled/default</span>
To use port 80 to route requests to our application server on port 3000, we will edit the nginx configuration file — /etc/nginx/sites-available/
Run the following commands:
$ cd /etc/nginx/sites-available/
$ sudo touch domain.com
$ sudo nano domain.com
The config file should be configured like this
server {listen 80;
listen [::]:80;
root /var/www/<your domain.com>/html;
index index.html index.htm index.nginx-debian.html</span><span id="6d49" class="dz jt ju fi jv b dg ll lm ln lo lp jx s jy">server_name yourdomain.com [www.yourdomain.com;](http://www.yourdomain.com%3B/)</span><span id="18d2" class="dz jt ju fi jv b dg ll lm ln lo lp jx s jy">location / {
        proxy_pass [http://localhost:8083;#whatever](http://localhost:8083;#whatever) port your app run
        proxy_http_version 1.1;
        proxy_set_header Upgrade $http_upgrade;
        proxy_set_header Connection 'upgrade';
        proxy_set_header Host $host;
        proxy_cache_bypass $http_upgrade;
    }
}
We have provided our server block files. To enable them, we create symbolic links using this command
sudo ln -s /etc/nginx/sites-available/devylawyer.ml /etc/nginx/sites-enabled/devylawyer.ml
Restart the nginx service
sudo service nginx restart
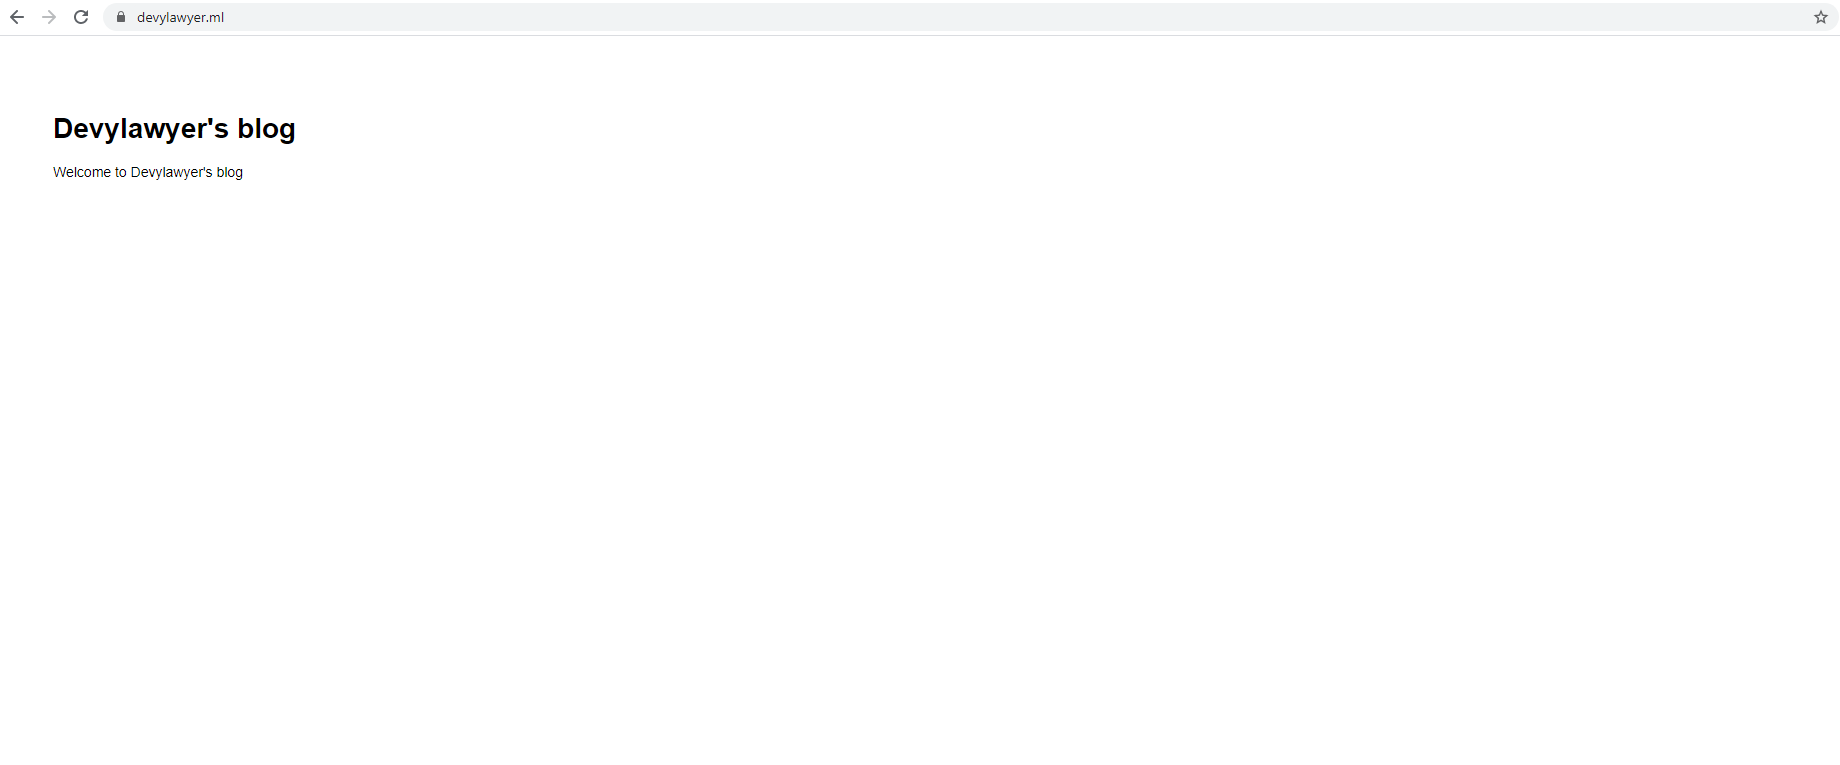
Now our app is running on www.devylawyer.ml.
Finally step is to secure our application by adding the SSL certificate.
Run these commands to install certbot and build certificate. You can read more about this here.
sudo apt-get install software-properties-common
sudo add-apt-repository ppa:certbot/certbot
sudo apt-get install python-certbot-nginx
Install the certificate on the domain
sudo certbot --nginx -d example.com -d www.example.com
Your final config file should look like this below. Replace example.com with your domain name and 3000 with your NODE port.
server {
  listen 80;
  listen [::]:80;
  server_name example.com www.example.com;
  return 301 https://$server_name$request_uri;
}

server {
  listen 443 ssl http2 default_server;
  listen [::]:443 ssl http2 default_server;
  server_name example.com www.example.com;

  location / {
    proxy_pass http://localhost:3000;
  }

  ssl_certificate /etc/letsencrypt/live/example.com/fullchain.pem;
  ssl_certificate_key /etc/letsencrypt/live/example.com/privkey.pem;
  ssl_protocols TLSv1 TLSv1.1 TLSv1.2;
  ssl_prefer_server_ciphers on;
  ssl_ciphers EECDH+CHACHA20:EECDH+AES128:RSA+AES128:EECDH+AES256:RSA+AES256:EECDH+3DES:RSA+3DES:!MD5;
  ssl_session_cache shared:SSL:5m;
  ssl_session_timeout 1h;
  add_header Strict-Transport-Security “max-age=15768000” always;
}
Restart nginx for the changes to apply
sudo service nginx restart
Now when we refresh, our site will be running on https://www.devylawyer.ml.
In conclusion, we were able to deploy a simple NodeJs application to an Amazon EC2 instance and have it running on a custom domain.